


Swordland Showdown is one of the most important Alliance events in the game, offering valuable rewards for both individual players and entire alliances. However, many players make the mistake of only chasing victory and ignoring how the reward system actually works.
In this guide, we will explain the best ways to earn relic points, use event mechanics effectively, and help your alliance gain the biggest advantage on the battlefield.
Compare regular in-game prices with current Mone prices to find the right Kingshot pack for your budget. The popular $4.99 pack currently offers the largest discount. Prices and discounts may change. The current price is always shown on the product page and again before payment.


Understanding Swordland Showdown Rewards
Before entering the battlefield, the first thing every player should understand is that Swordland Showdown has two separate reward systems: alliance rewards and personal rewards.
Alliance rewards are decided by the total number of Alliance Relic Points your team earns during the event. If your alliance finishes with more points than the opponent, you will enter the winner bracket and receive better alliance rewards. However, losing the match does not mean you leave empty-handed.
Personal rewards depend on your own Relic Points. This means even if your alliance fails to win, you can still collect impressive rewards by staying active and earning enough points individually. Because of this, the best strategy is not simply focusing on the final result, but maximizing your personal contribution while helping your alliance control the map.
Best Ways to Earn Relic Points
There are several ways to gain points during Swordland Showdown, and successful players know how to combine all of them instead of relying on only one method.
Capture and Control Buildings
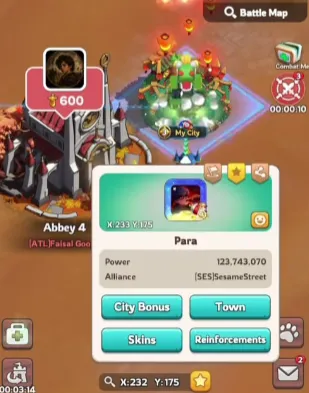
Buildings are the core objective of Swordland Showdown. Capturing a building for the first time provides an immediate Relic Point bonus, and keeping control of that building will continue generating points over time.
Among all locations, the Sword Shrine is usually the most valuable objective because it provides the highest amount of points. Sanctums are also extremely important and should be prioritized whenever possible.
However, holding one building for the entire battle is not enough. Many players stay inside important structures and ignore other opportunities, which causes them to lose valuable personal points. Good players know when to defend and when to move to new objectives.

Collect Arsenal Supplies
Whenever a building changes ownership, Arsenal Supplies will appear nearby. These supply crates are one of the fastest ways to increase your score because they provide instant Relic Points.
Many players underestimate these supplies and focus only on fighting around buildings. This can be a huge mistake. After capturing or losing an important structure, always check the surrounding area and collect the available crates before the enemy takes them.
For players who cannot lead major rallies, collecting Arsenal Supplies is also one of the easiest ways to make a meaningful contribution.
Gather from Underellers
Underellers are special gathering locations that appear during the later stages of the event. Since they do not stand out as obvious objectives, many players completely ignore them.
Although gathering from Underellers is slower compared to combat or capturing buildings, these locations can provide a steady stream of points throughout the battle. If your alliance already controls key areas and you have extra marches available, sending troops to gather from Underellers is a great way to increase your score.
Fight Enemy Troops
Combat is one of the best ways to earn Personal Relic Points. Every time you defeat enemy troops, you gain points, and active players who participate in battles usually achieve much higher scores.
Attacking enemy troops generally provides better rewards than simply defending. Therefore, staying in your starting area and avoiding fights will limit your final reward potential.
Since troops do not permanently die in Swordland Showdown, players should be more aggressive than they normally would be in regular battles.
Important Event Mechanics You Should Know
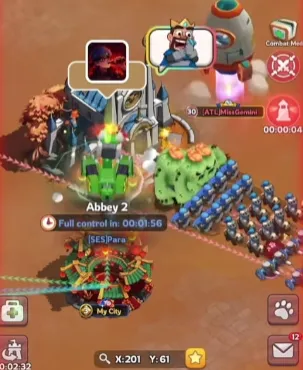
One of the biggest advantages of Swordland Showdown is that there are no permanent troop losses. Defeated troops will only become injured, and the Battlefield Infirmary has unlimited capacity.
This allows players to fight more aggressively without worrying about losing their army permanently.
If your infirmary becomes full, you can leave the battlefield and wait for the cooldown period. After returning, your troops will be restored and ready to fight again. This is often much more efficient than spending large amounts of healing speedups during the event.
The event also provides free teleport opportunities and march speed boosts. Do not save these items for later. Fast movement is extremely important because controlling the battlefield requires constant repositioning. Alliances that move quickly can capture more objectives and respond to enemy attacks much faster.
Special Buildings and Their Importance
Besides the Sword Shrine and Sanctums, several special buildings provide powerful bonuses that can influence the entire battle.
The Bell Tower reduces building capture time, allowing your alliance to secure objectives faster and gain important first-capture rewards.
The Royal Stables reduce teleport cooldowns, making it easier for players to move across the map and support different battles.
The Hall of Reformation provides combat bonuses by increasing damage dealt and reducing damage taken. This advantage becomes especially valuable during large-scale fights.
The Mercenary Camp can still provide benefits, but it is usually considered a lower priority compared to other special buildings. Smart alliances understand which objectives deserve full attention and which ones can be ignored temporarily.
Alliance Strategy: How to Play as a Team
Individual skill matters in Swordland Showdown, but teamwork is what decides the final outcome.
Alliance leaders should clearly communicate targets and assign priorities throughout the battle. Strong players should focus on leading rallies, attacking important enemy positions, and defending major structures. Other members can contribute by reinforcing buildings, collecting supplies, and supporting battles.
A common mistake is putting the entire alliance into one location. For example, if everyone stays at the Sword Shrine, the enemy can capture other buildings across the map and slowly build a larger score advantage.
The goal is not just controlling one powerful structure. The real objective is controlling the entire battlefield.
Pay attention to enemy buildings that have been occupied for a long time. Capturing these locations can create large amounts of Arsenal Supplies, which may completely change the result during the final stage of the event.

Final Tips to Maximize Your Rewards
The biggest lesson in Swordland Showdown is simple: do not only focus on winning. Focus on earning as many points as possible.
A strong player should always look for opportunities to:
- Capture valuable buildings and maintain control.
- Collect Arsenal Supplies whenever they appear.
- Gather from Underellers when extra marches are available.
- Join battles and defeat enemy troops.
- Use teleports and movement items to stay active.
The players who understand how to balance personal rewards and alliance objectives will consistently perform better, regardless of whether their alliance wins or loses.
Conclusion
Swordland Showdown rewards smart decisions, teamwork, and constant activity. Master the scoring system, communicate with your alliance, and keep fighting until the final moment to maximize your rewards.
Want to strengthen your account and prepare better for future events? Use Mone to safely top up your game resources with great value deals, helping you upgrade faster and stay ahead of the competition. Join the battlefield fully prepared and make every Swordland Showdown count!