

NTE Version 1.4 has added three new Anomaly Commissions, and they are anything but ordinary. One sends you into a miniature world where even everyday furniture becomes an obstacle. Another involves a late-night bus ride that quickly turns into a supernatural experience. The third takes you into a dream where getting some proper sleep is somehow harder than fighting enemies. Apparently, working for the Anomaly Management Bureau is not exactly a normal office job.
This guide covers all three Anomaly Commissions in Version 1.4: The Little People in the Mirror World, The Last Bus at Night, and An Ordinary Dream. Each walkthrough follows the mission route, including exploration, mechanisms, item collection, and the final steps to completion.
NTE 1.4 Anomaly Commission 1: The Little People in the Mirror World Guide
How to Enter The Little People in the Mirror World
First, track The Little People in the Mirror World from the Anomaly Commission menu. Then head to the amusement park facility Teleport Point above Pukale Amusement Park.
Once you arrive, follow this route:
- Follow the road ahead, go down the stairs, and turn left.
- Continue past the large staircase. Once you reach the upper level, turn left.
- Turn right and enter the door on your right.
- Approach the mirror inside the room and select Investigate.
After interacting with the mirror, you will enter The Little People in the Mirror World.
It is recommended to bring a small-sized character before entering the instance. Some routes require you to pass through narrow gaps, and character size can affect your ability to move through them.
Safes and Rewards in The Little People in the Mirror World
There are 12 safes in the instance, and each one rewards 20 Annulith.
|
Exploration Item |
Quantity or Details |
|
Safes |
12 |
|
Reward per Safe |
20 Annulith |
|
Total Annulith from Safes |
240 |
|
Key Items |
Dissolving Agent, Laundry Detergent, Egg, Hacksaw, Batteries |
|
Main Mechanisms |
Fans, Buttons, Bubbles, Elevators |
Stage 1: Activate the Fan and Collect the Early Safes
After entering the instance, follow the path ahead and turn right to find a large fan.
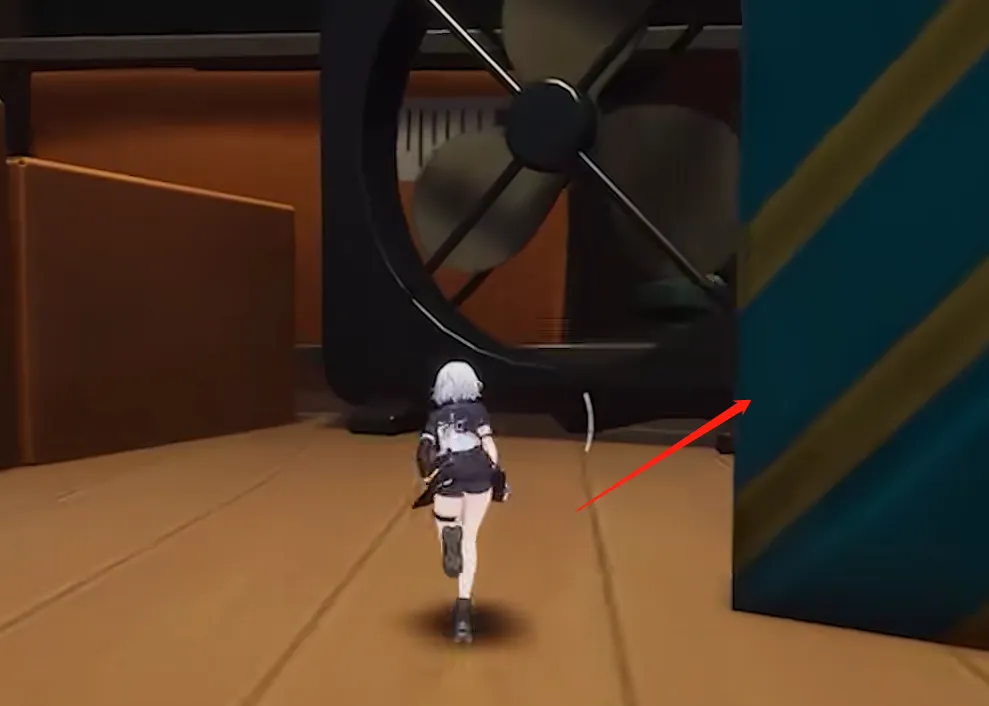
Find the nearby button and step on it. Then return to the cardboard box area and squeeze through the gap between the two boxes.
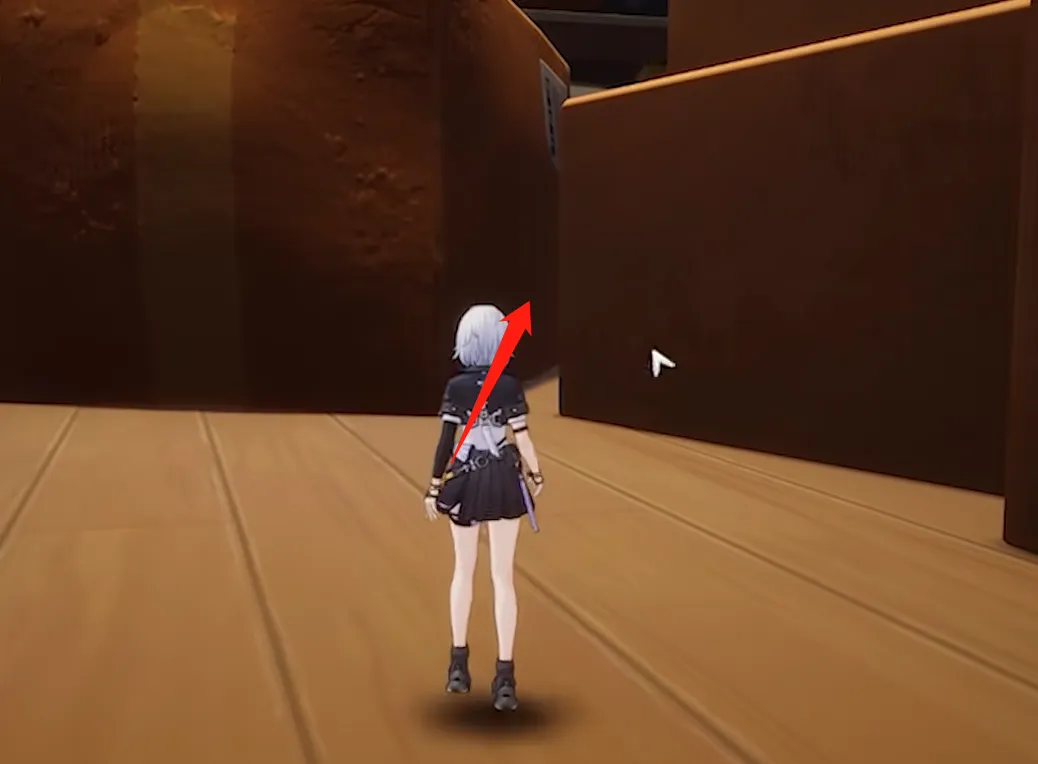
Next, go underneath the large metal cabinet to find and open the first safe.
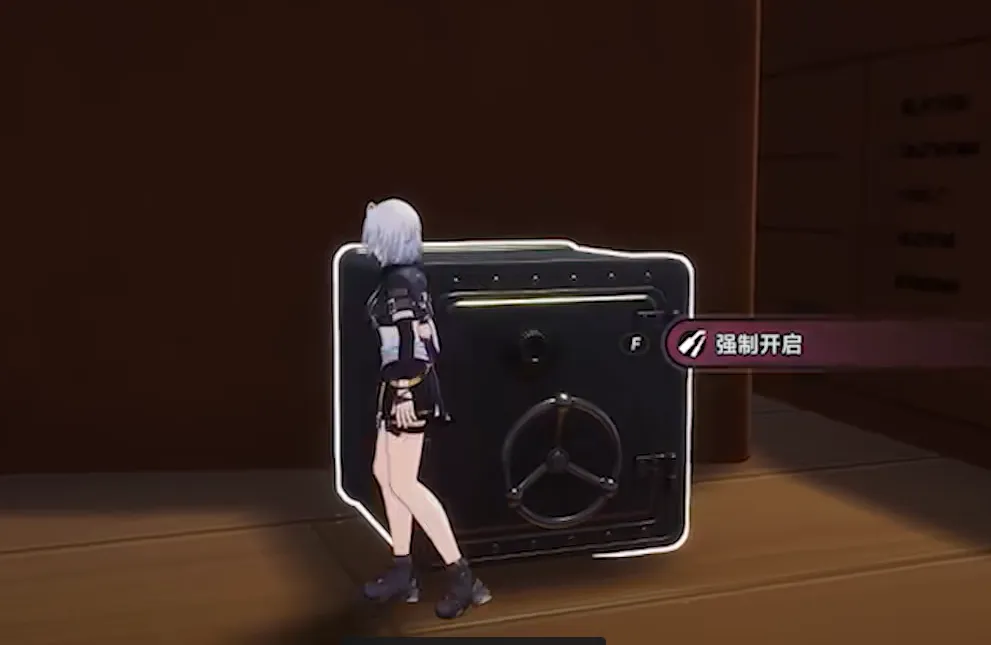
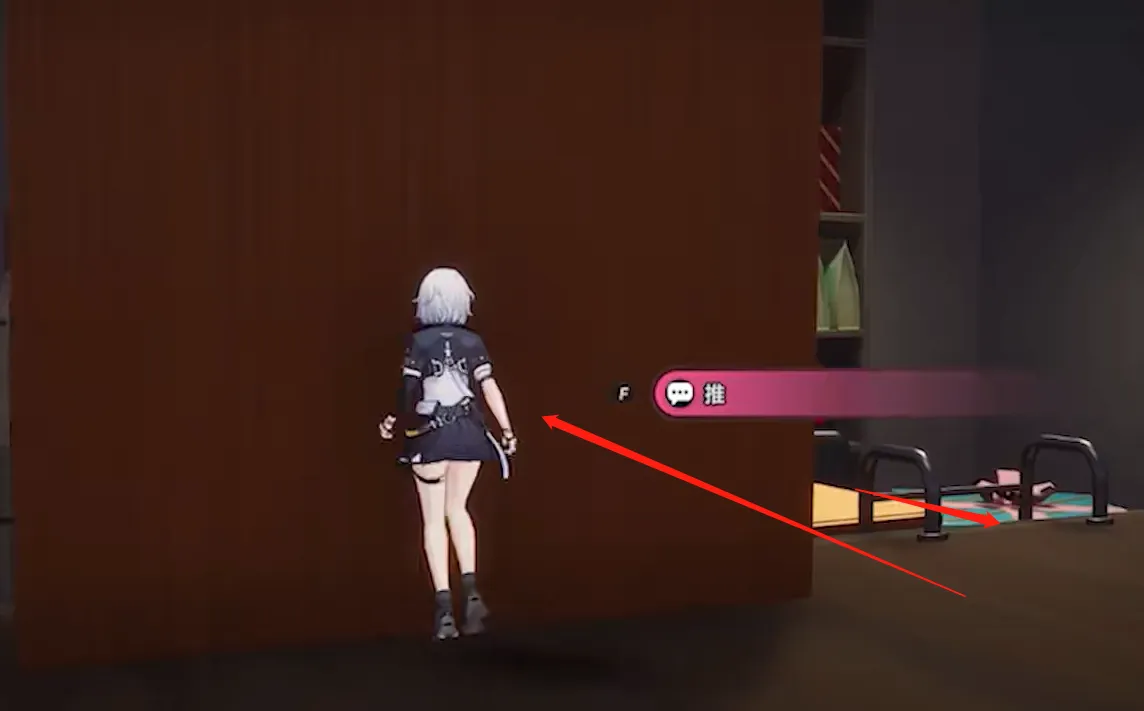
Jump from the gift box onto the cardboard boxes, then onto the drawer. Climb the ladder and turn around to push the wooden board. Pass through the glass cover and continue toward the upper-right corner of the minimap.
Find the toy car and drive forward, making sure to avoid the cats along the way.
While driving, adjust the car so that its windshield faces the launcher on the left. Use the launcher to reach the other side and continue moving.
At the end of the route, turn right and head down. Turn right again to find a safe on a small round table.
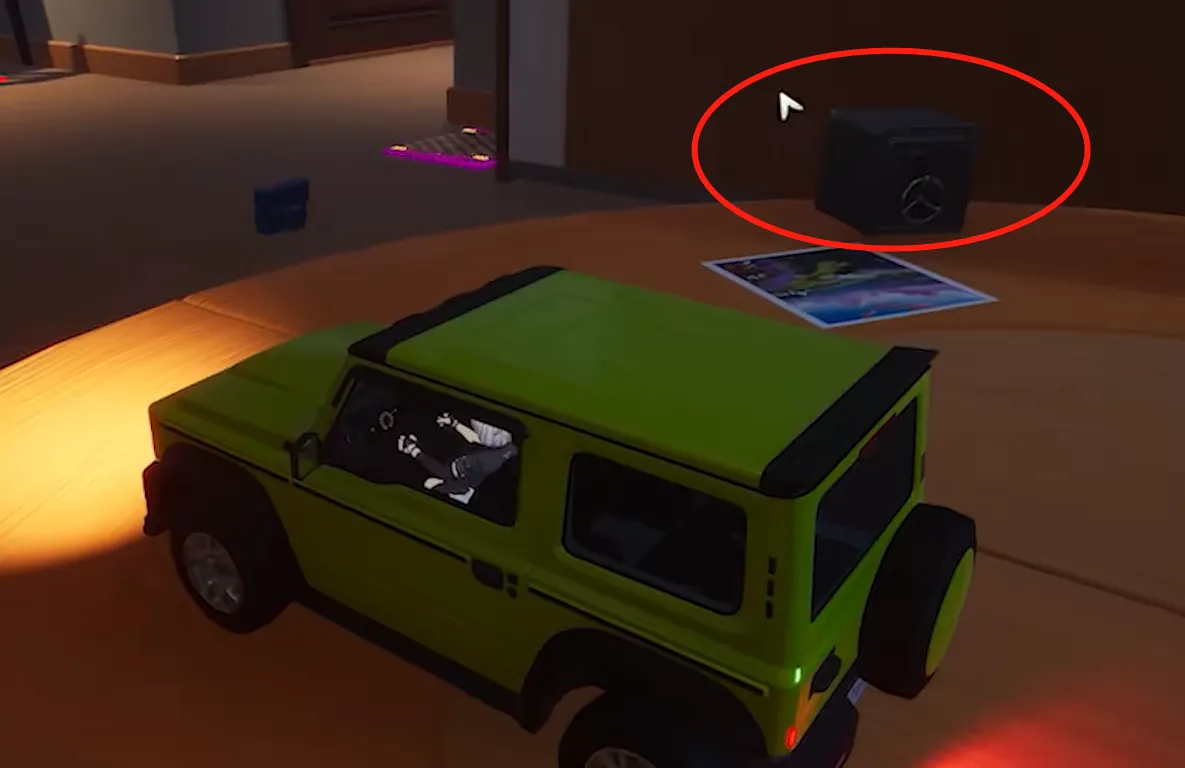
Open it, return to the toy car, and continue toward the upper part of the map. Watch the cats carefully and look for an opportunity to get out of the car and move quickly.
Collect the First Batch of Dissolving Agent
After getting out of the car, head to the slope on the right. Climb onto the wooden platform and collect the Dissolving Agent.
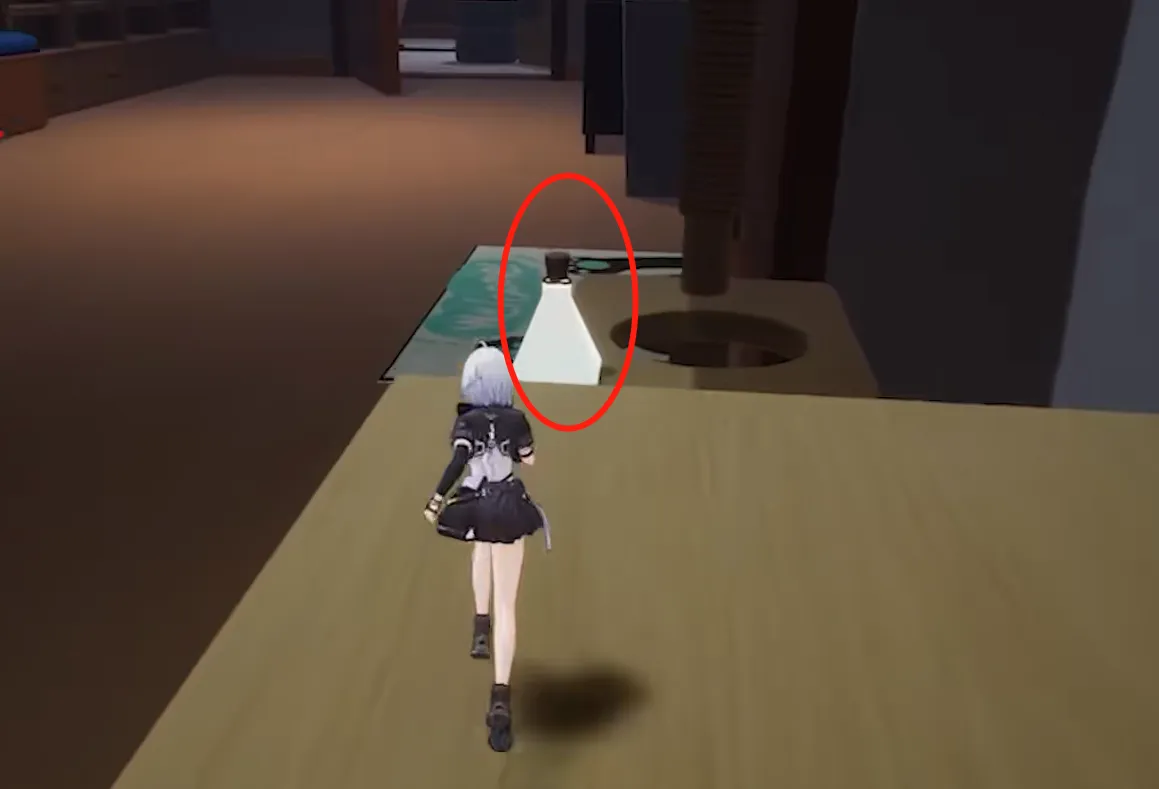
Continue left and enter the bathroom. Climb through the pipe to reach the upper area, then interact with the faucet in the lower-left corner.
Next, swim toward the upper-left area and find the green block. Push it down.
Use the metal plate to jump onto the platform and collect another Dissolving Agent.
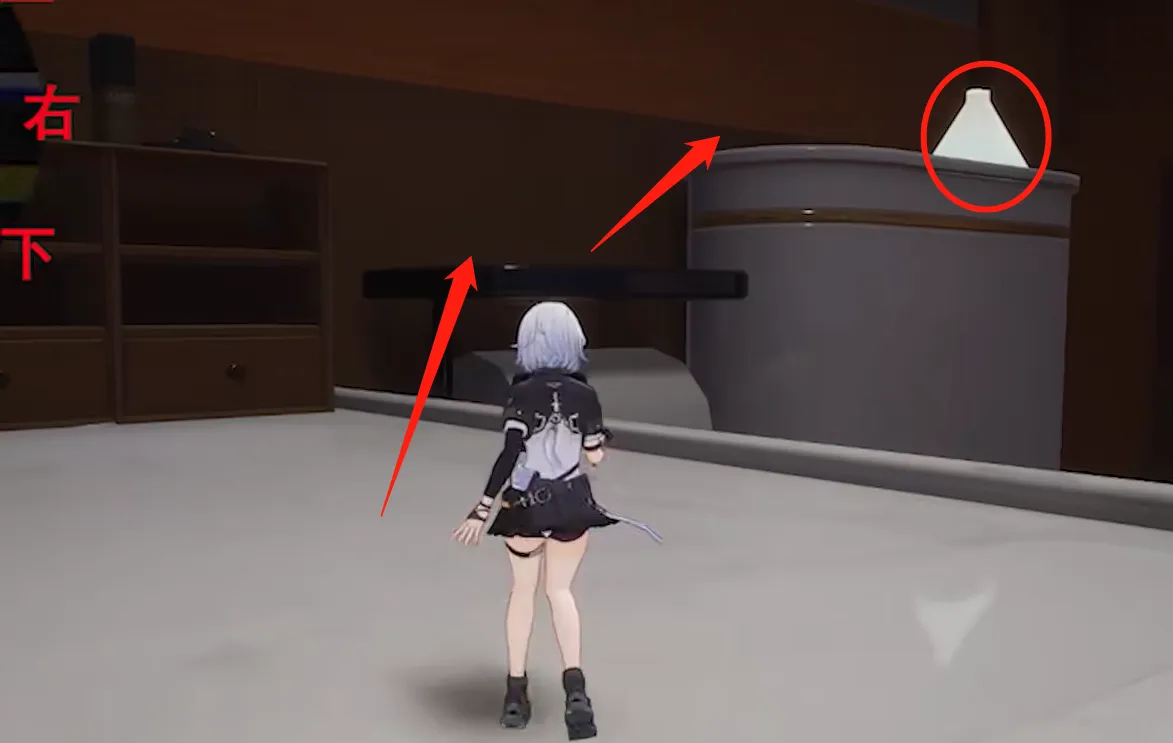
Stage 2: Laundry Detergent, Bubbles, and the Kitchen Puzzle
After collecting the Dissolving Agent, head to the pipes in the upper-right area of the map and jump through them into the laundry basin.
Find and pick up the Laundry Detergent inside the basin.
Next, use the nearby fans to jump between the laundry basins at different heights. Continue until you reach the larger basin.
Add the Laundry Detergent here to obtain soapy water.
Then head to the upper-right area and find the water gun. Fire it and use the bubbles that appear to move upward.
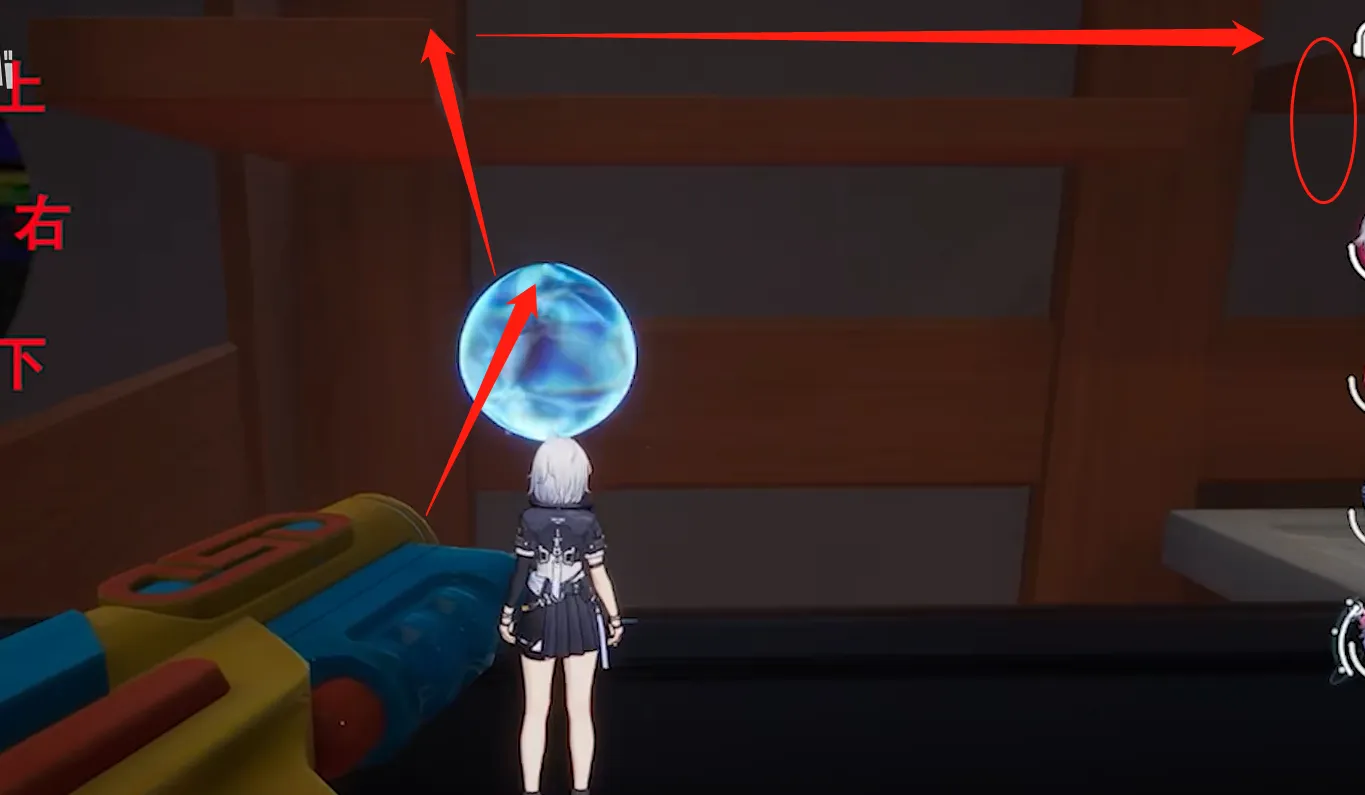
Near the washing machine, find the second water gun and fire it again. Use the bubbles to jump onto the upper platform.
Continue jumping along the platform to collect the next Dissolving Agent.
Safe in the Drawer Area
After collecting the Dissolving Agent, head to the white platform in the upper-left area, then move across the drawers below.
Follow the drawers and platforms to find and open the safe.
Then leave through the upper route and enter the vent on the right.
Kitchen Area: Find the Egg and Cook a Fried Egg
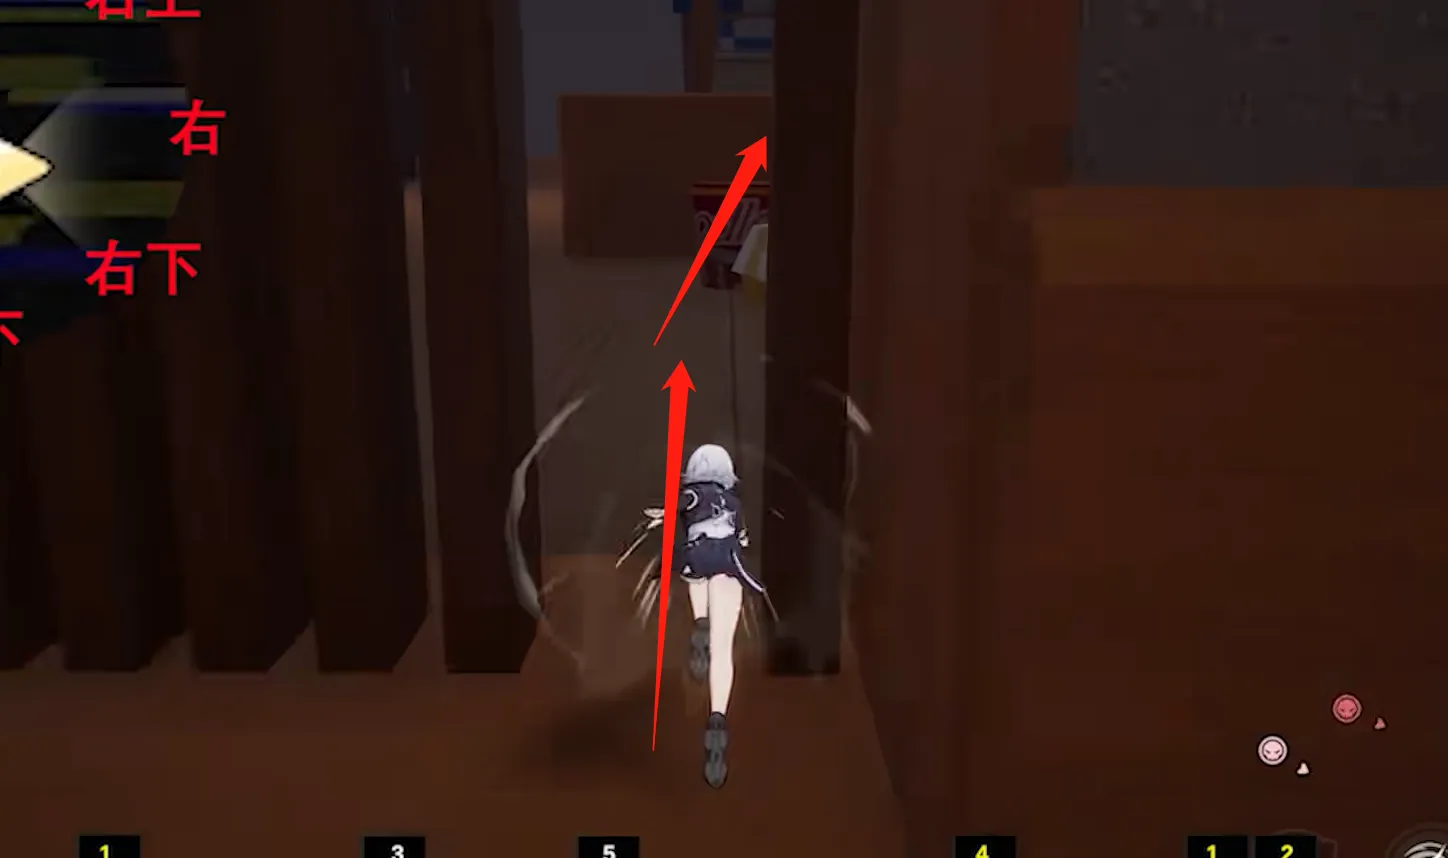
After passing through the vent, climb onto the instant noodle area ahead and jump onto the red ball.
Continue forward to find and pick up the Egg.
Use the nearby fan to move toward the area behind the red pot. Find the yellow frying pan.
Interact with the frying pan and select the following options in order:
- Add Ingredients.
- Cook.
- Serve.
Once completed, you will obtain a Fried Egg.
Take the Fried Egg to the fan in the lower-right area and find Tuansanlang. Interact with it and select "I have something here." Then open the safe behind it.
Continue toward the upper-right area of the map to find the refrigerator. Use the fan below to enter the refrigerator and break all the ice blocks. This will reveal another safe.
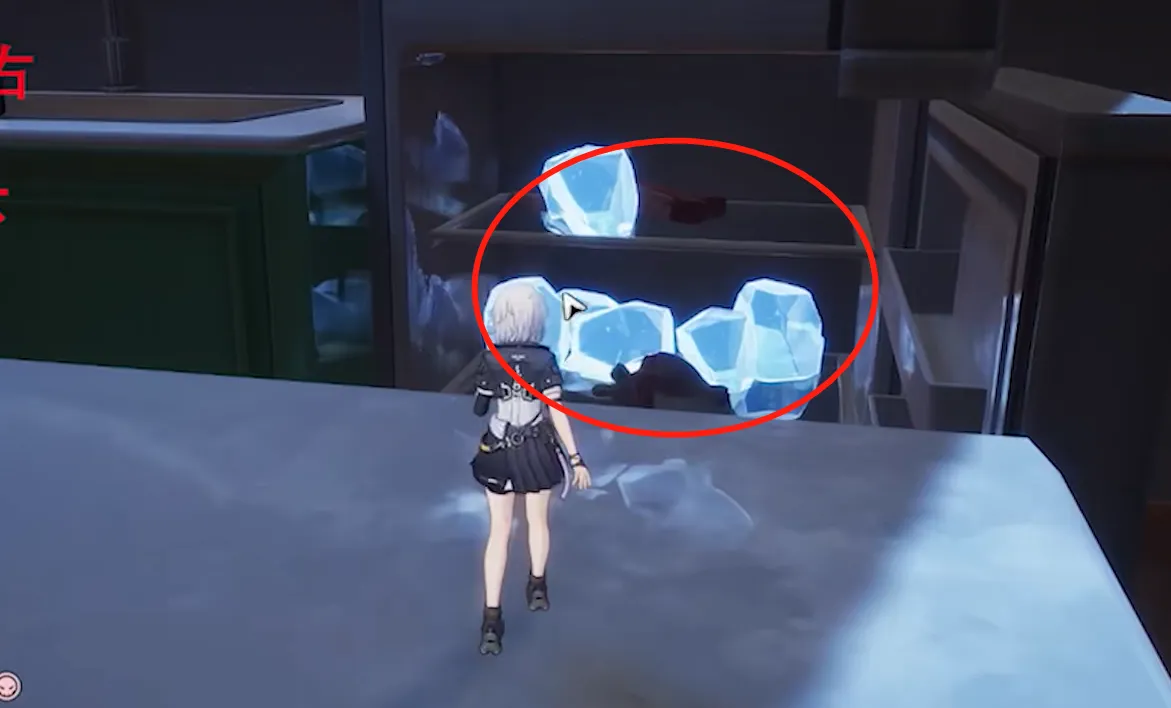
Open it, return to the cabinet, and use the fan to jump onto it. Continue along the pipe.
Find the safe inside the cabinet midway through the pipe and open it.
Stage 3: Hidden Routes and the Remaining Safes
After completing the previous exploration, follow the pipe and leave through the vent.
You will need a small-sized character again. Squeeze through the narrow gap, find the bathtub in the lower-left area, and jump inside.
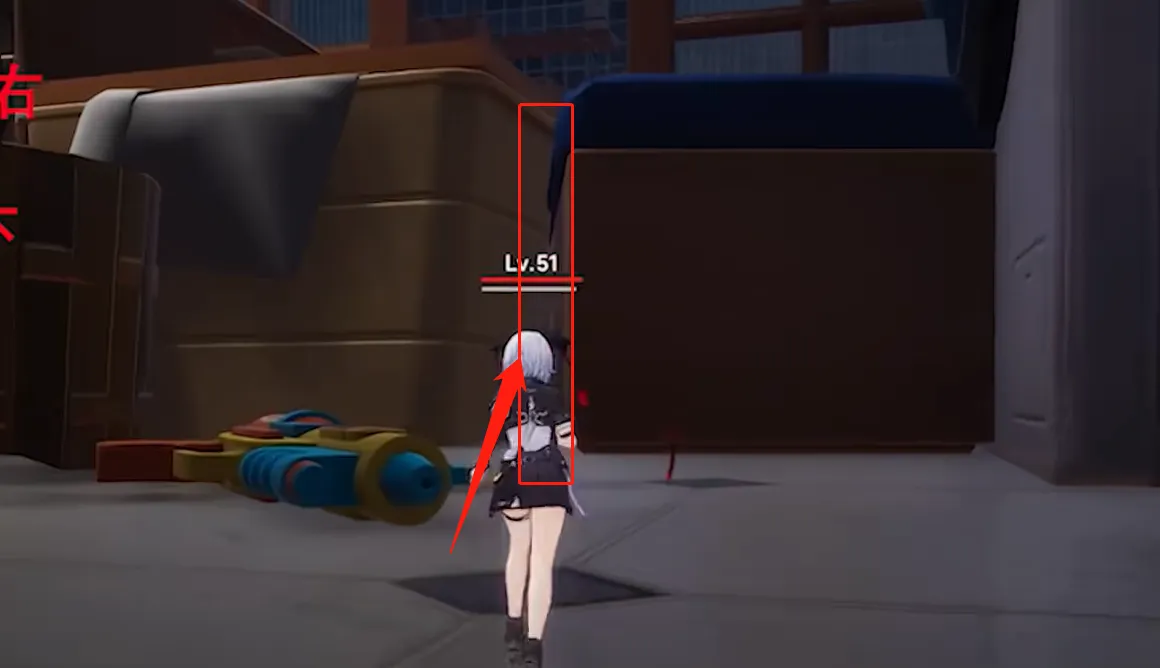
Wait for the bouncing effect to launch your character upward, then jump into the bubble above.
Continue along the edge of the pool and use the ducks as stepping points to reach the bathtub ahead. Open the safe inside.
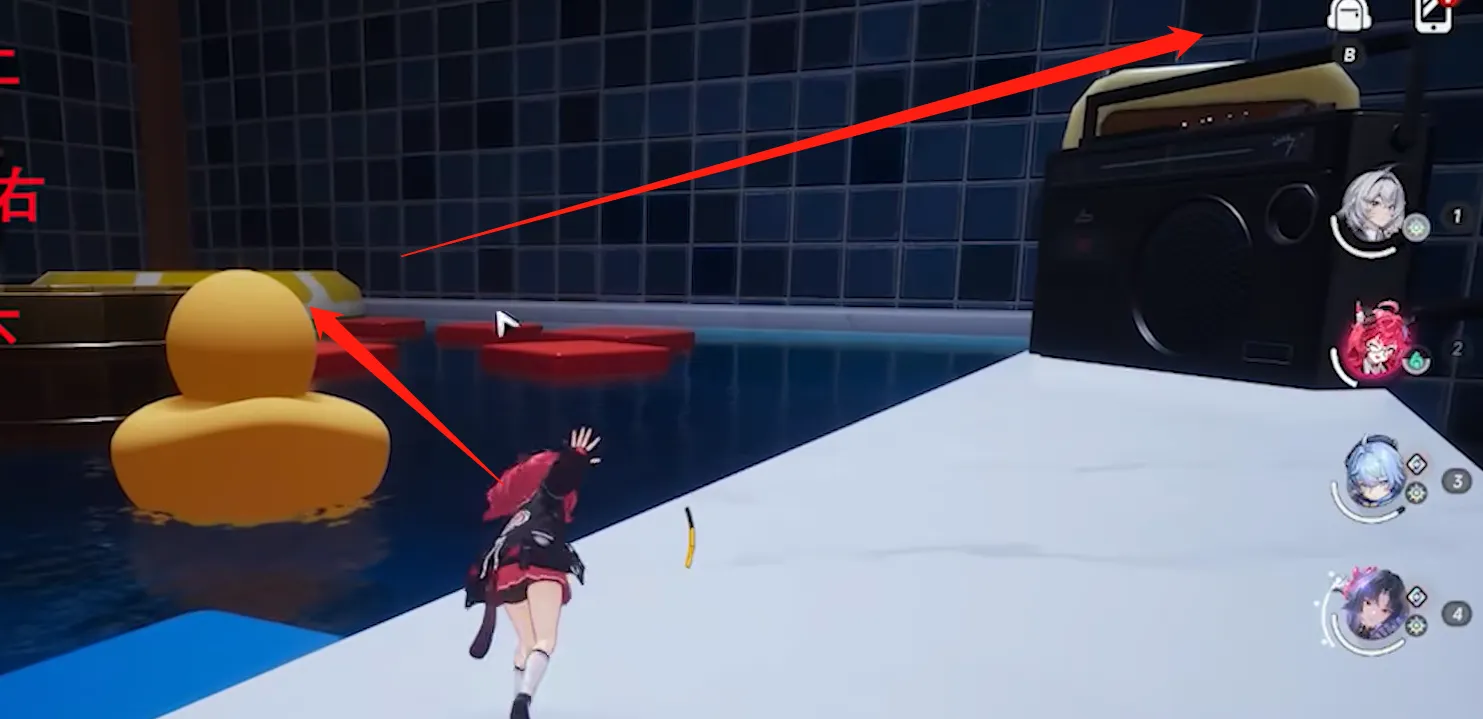
Continue Through the Blocks and Pipes
After opening the safe, head to the red block area on the left and jump upward step by step.
After passing the final block, swim left. Climb out of the water, enter the pipe, and reach the cabinet above.
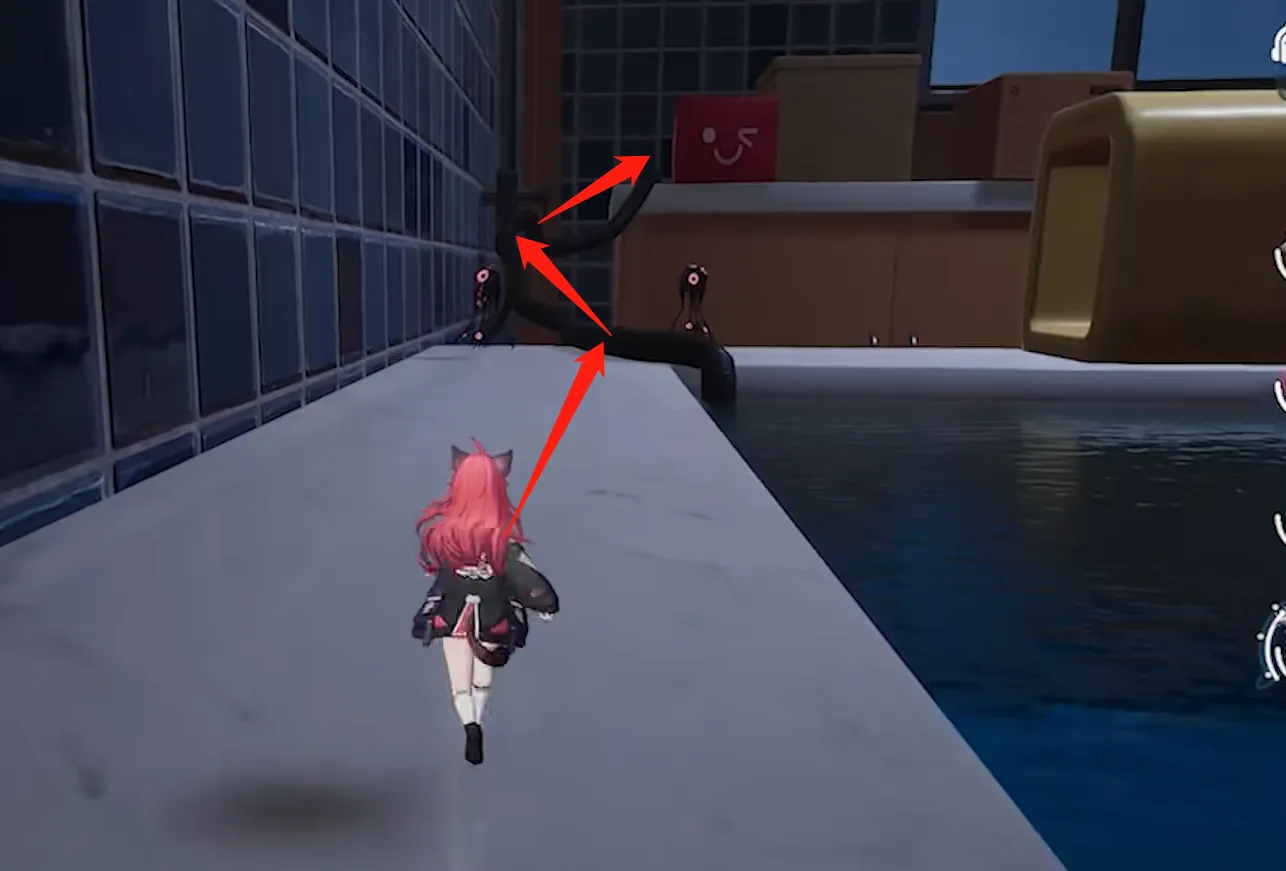
Control your jumps carefully in this section. Avoid jumping blindly in quick succession. Your character is already tiny enough. Falling down would turn this into a full-on search-and-rescue mission.
Continue forward from the cabinet and find the button. Step on it.
Then use the fan below to jump onto the windowsill on the left. Follow the windowsill, find the fan in the lower-right area, and jump behind it.
Push the green block and return below. Find the safe that requires forced opening and open it.
Continue forward and collect the Dissolving Agent near the button.
Clear the Drain
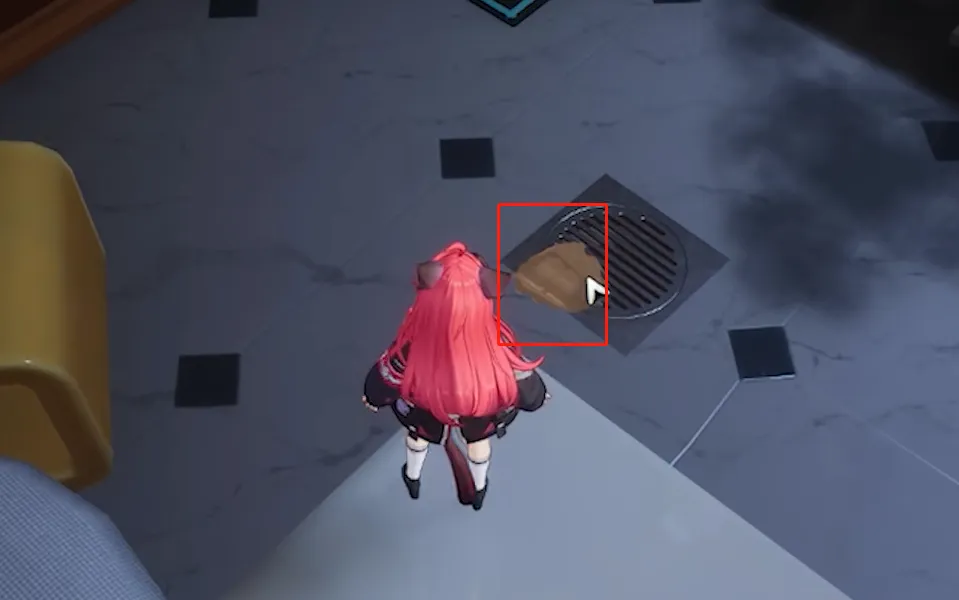
Now head to the lower-right area of the map and find the drain.
Use the four Dissolving Agents collected earlier to clear the sludge. This will open the route out of the instance.
If you have not collected all the safes yet, do not leave just yet. Continue exploring the remaining areas first.
Stage 4: The Hacksaw, Batteries, and Final Escape
Leave through the door in the lower-right area and return to the initial hall.
Find the toy car you used earlier. Avoid the cats and drive toward the launcher.
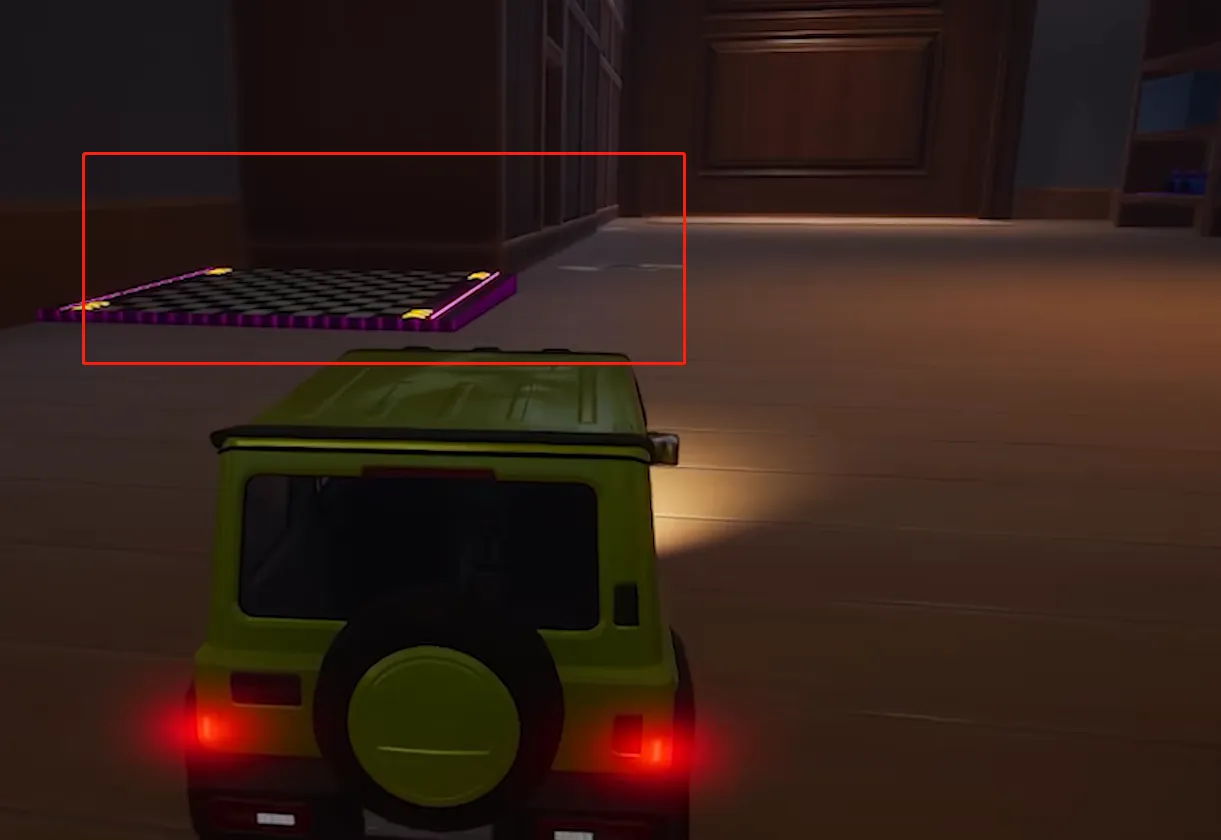
After reaching the other side, get out of the car, follow the wooden board, and pick up the Hacksaw.
Find and open the nearby safe, then head to the vent in the lower-right area.
Use the Hacksaw to open the vent and enter the area inside.
Clear the enemies there and pick up the Battery in the center.
Next, leave through the left side and follow the path to find and open another safe.
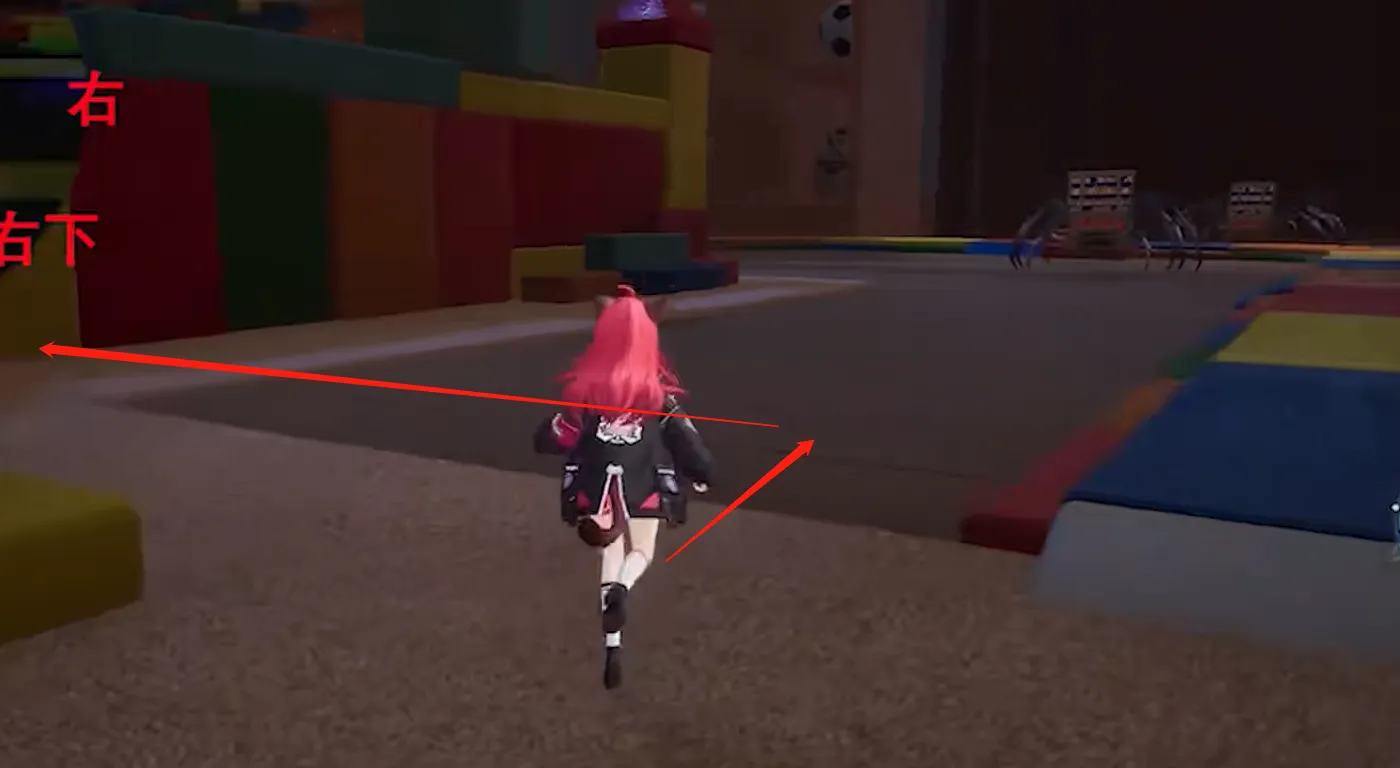
Collect the Second Battery
Use the safe and blocks to jump upward. Pass the blue pillow and enter the block area. Find and pick up the Battery on the red and yellow blocks.
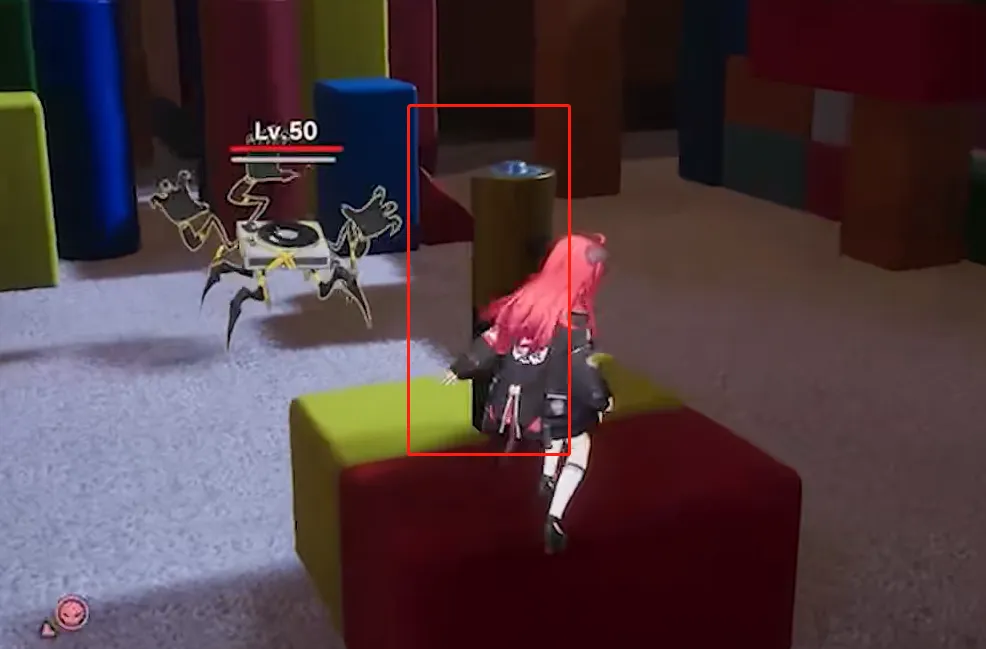
Return to the blue pillow and enter the route beneath the cabinet. Move upward through the red blocks inside the cabinet. Pass the book and platform to enter the passage ahead.
Continue using the red blocks and platforms to jump upward and reach the upper area. Then move forward and descend level by level until you find the safe in the passage.
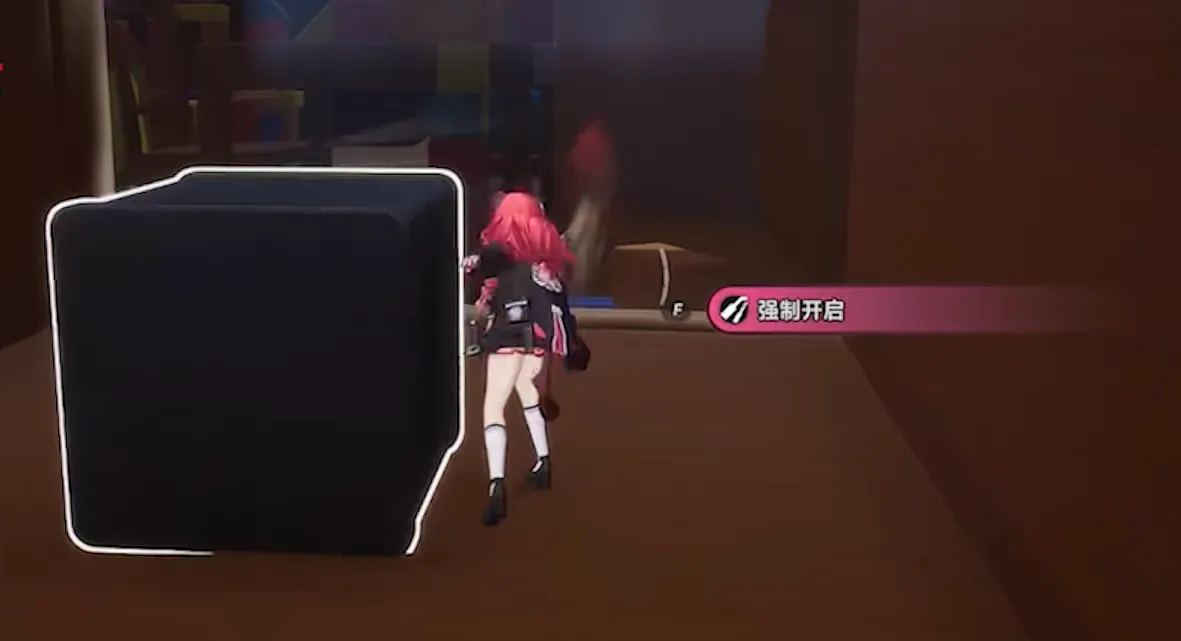
Open it, push the nearby green block, and continue in the direction of the red flag.
Cross the Block Bridge and Use the Elevators
Follow the slope made of red and yellow blocks and keep moving upward. Find and open the safe at the top.
Then cross the block bridge to the other side and pick up the Battery beside the blue block.
Return along the same route and find the button. Step on it and keep it pressed.
Quickly head to the elevator on the right and use it to move upward.
Continue forward from the upper level and descend to find another Battery. Pick it up.
Next, head to the button in the upper-left area. Step on it, then quickly move to the green elevator on the left.
Use the elevator to go up, climb over the book ahead, and find the remote control. Interact with it.
Once the remote control is activated, the vent ahead will open.
Enter the vent and continue forward to escape the instance and complete The Little People in the Mirror World Anomaly Commission.
NTE 1.4 Anomaly Commission 2: The Last Bus at Night Guide
The Last Bus at Night Location
First, track The Last Bus at Night from the Anomaly Commission menu.
The mission is located to the right of Bibo Volleyball Court.
Once you arrive, find the bus stop and read the newspaper there. Then wait for the bus to arrive.
When the bus pulls in, board it and take a seat. Wait for it to travel to the next stop.
This is not going to be an ordinary sightseeing trip. You will need to find a doll, operate switches inside a factory, and get some rather unusual passengers onto the bus. It may be a good idea to lower your expectations for a normal commute.
Stop 1: Find the Doll and Bring It onto the Bus
When the bus reaches the first stop, get off and go to the bus stop ahead. Interact with the newspaper to read it.
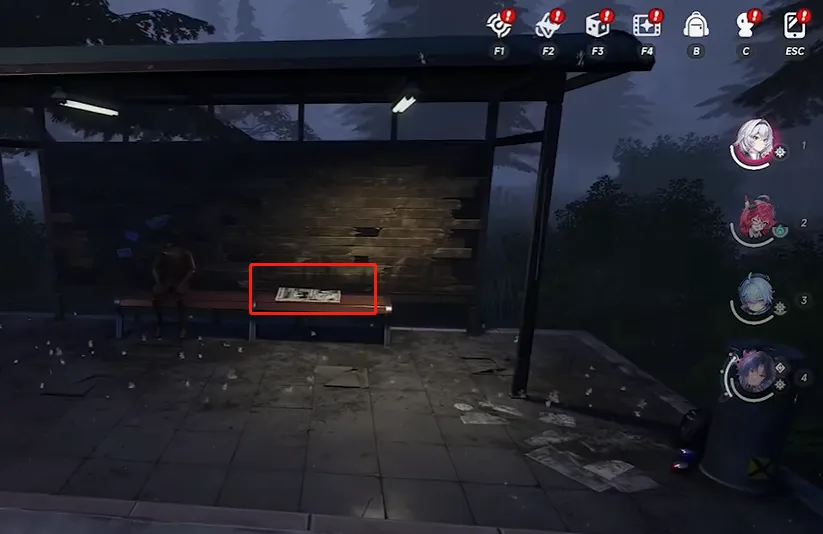
After reading it, turn around and head toward the upper part of the minimap.
Climb over the railing ahead and continue toward the factory in the upper-right area of the minimap.
Inside the factory, find a crouching doll on the left. Approach the doll and knock on it. Then take it with you.
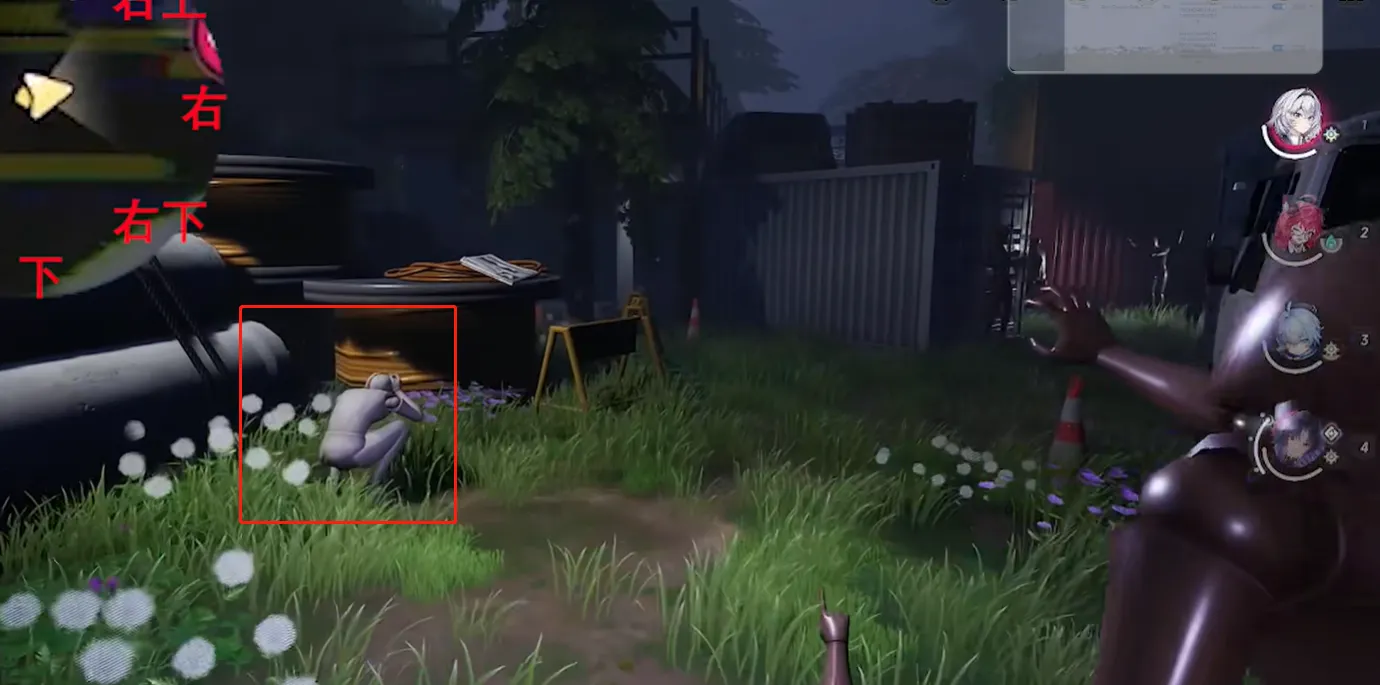
How to Bring the Doll Back to the Bus
Carry the doll toward the bottom of the minimap to return to the bus.
Keep an eye on the doll along the way to prevent it from straying from the route.
When you reach the bus, make sure to pass through the bus stop before boarding. According to the route, boarding directly without passing through the stop may cause a clipping issue.
Once the doll has reached the bus successfully, board it, take a seat, and wait for the bus to travel to the second stop.
Stop 2: Factory Mechanisms and the Shadow
When the bus reaches the second stop, get off and read the newspaper at the bus stop.
After interacting with it, head toward the upper part of the minimap, cross the road, and continue forward. At the factory entrance in the upper-right area of the minimap, find and activate the switch.
Then enter the factory, go to the container in the front-right area, and turn left to operate the second switch.
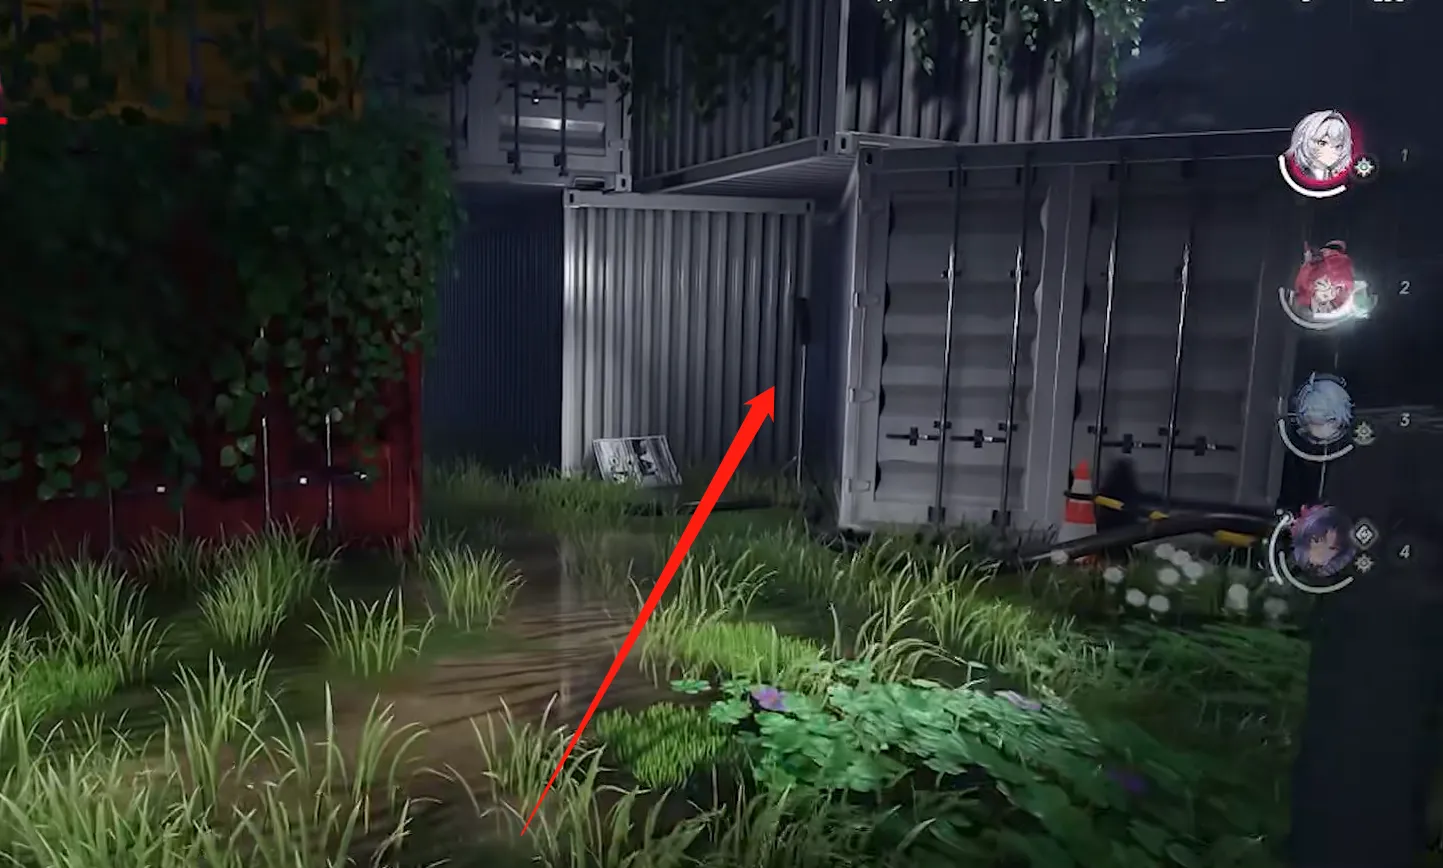
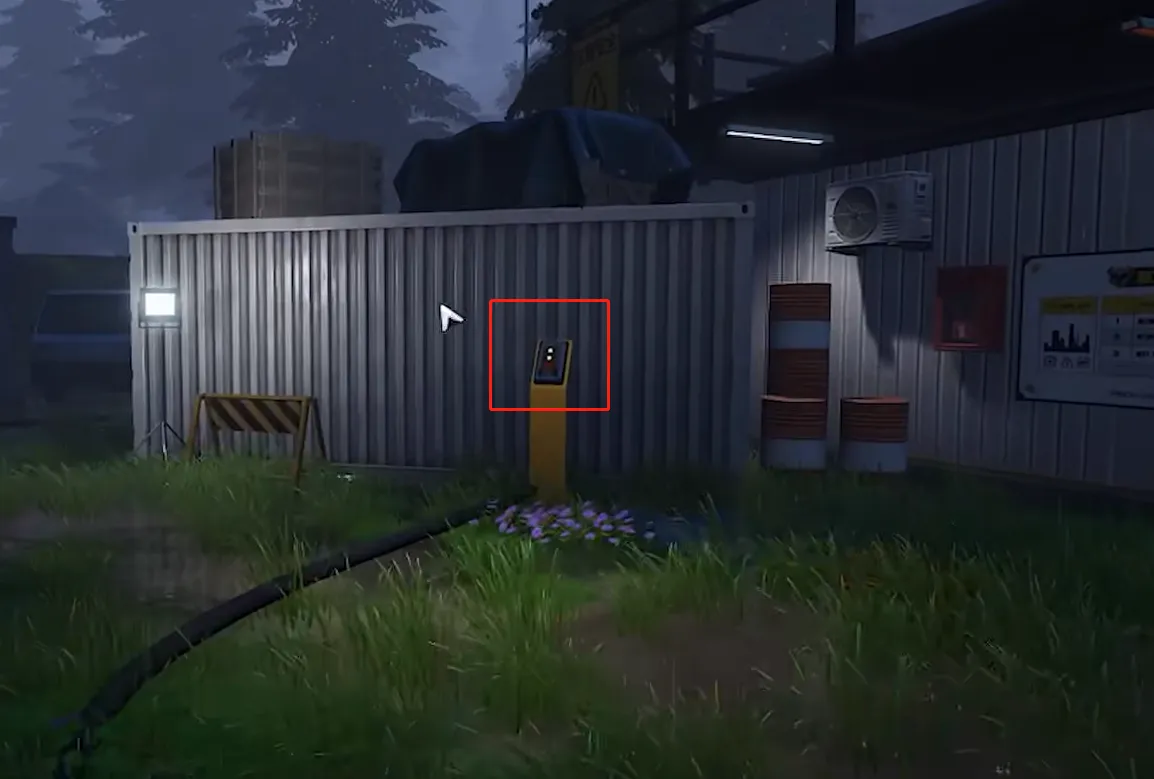
How to Activate the Switch Behind the Shadow
Continue through the passage on the left and watch for the shadow ahead.
There is another switch behind the shadow. You cannot approach it directly from the front, so you need to jump around the right side.
Follow these steps:
- Jump around the shadow from the right.
- Jump down near the boxes.
- Quickly activate the switch ahead.
- Leave the area immediately after activating it.
- Turn toward the lower part of the minimap and continue forward.
- After moving some distance, turn around and check the shadow's position.
- Activate the switch again.
Speed is important here. Do not stand still after operating the switch. Leave the area quickly and watch how the shadow moves.
Get the Shadow onto the Bus
After completing the mechanism, lead the shadow toward the bus.
Once you reach the bus, take a seat and wait for it to travel to the third stop.
Keep an eye on the shadow during this section to make sure it follows you to the bus.
Stop 3: Interact with Tajido
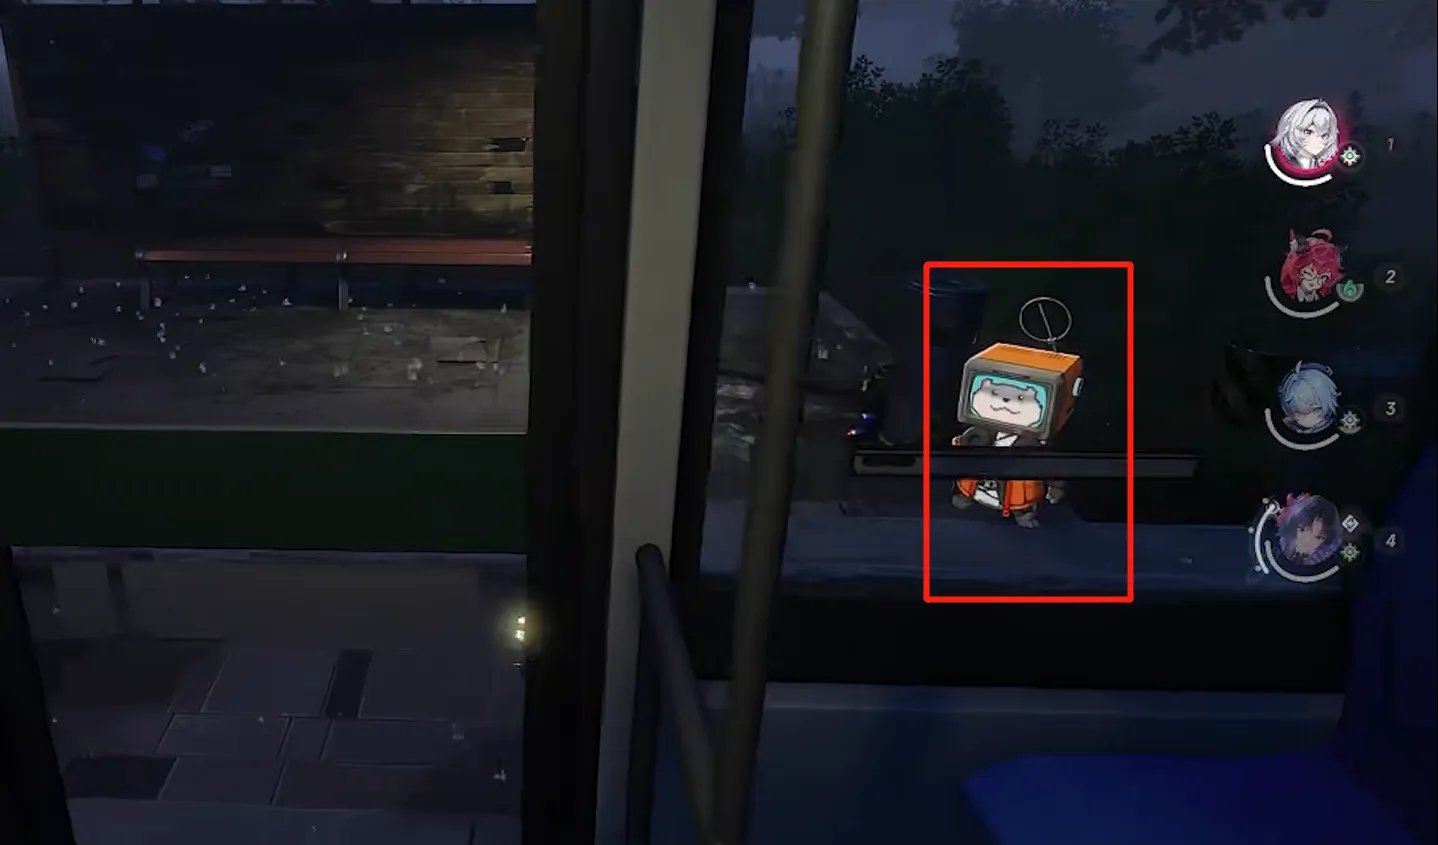
When the bus reaches the third stop, get off.
Find Tajido and interact with him.
After the interaction, turn around and board the bus again. Take a seat.Then wait for the bus to continue moving.
How to Complete The Last Bus at Night
Once you are back on the bus, no additional complicated actions are required. Simply wait for it to move forward.
The Last Bus at Night Anomaly Commission will be completed after the bus passes through the tunnel.
The Last Bus at Night Quick Walkthrough
|
Stage |
Key Action |
|
Starting Location |
Bus stop to the right of Bibo Volleyball Court |
|
Before Departure |
Read the newspaper and wait for the bus |
|
First Stop |
Read the newspaper and head to the factory to find the doll |
|
Doll Collection |
Knock on the doll and bring it back to the bus |
|
Boarding Tip |
Pass through the bus stop before boarding to avoid clipping |
|
Second Stop |
Read the newspaper and head to the factory |
|
Factory Mechanisms |
Activate the entrance switch, container switch, and switch behind the shadow |
|
Shadow Section |
Lead the shadow to the bus |
|
Third Stop |
Get off and interact with Tajido |
|
Final Stage |
Board the bus again and wait for it to pass through the tunnel |
NTE 1.4 Anomaly Commission 3: An Ordinary Dream Guide
An Ordinary Dream Location
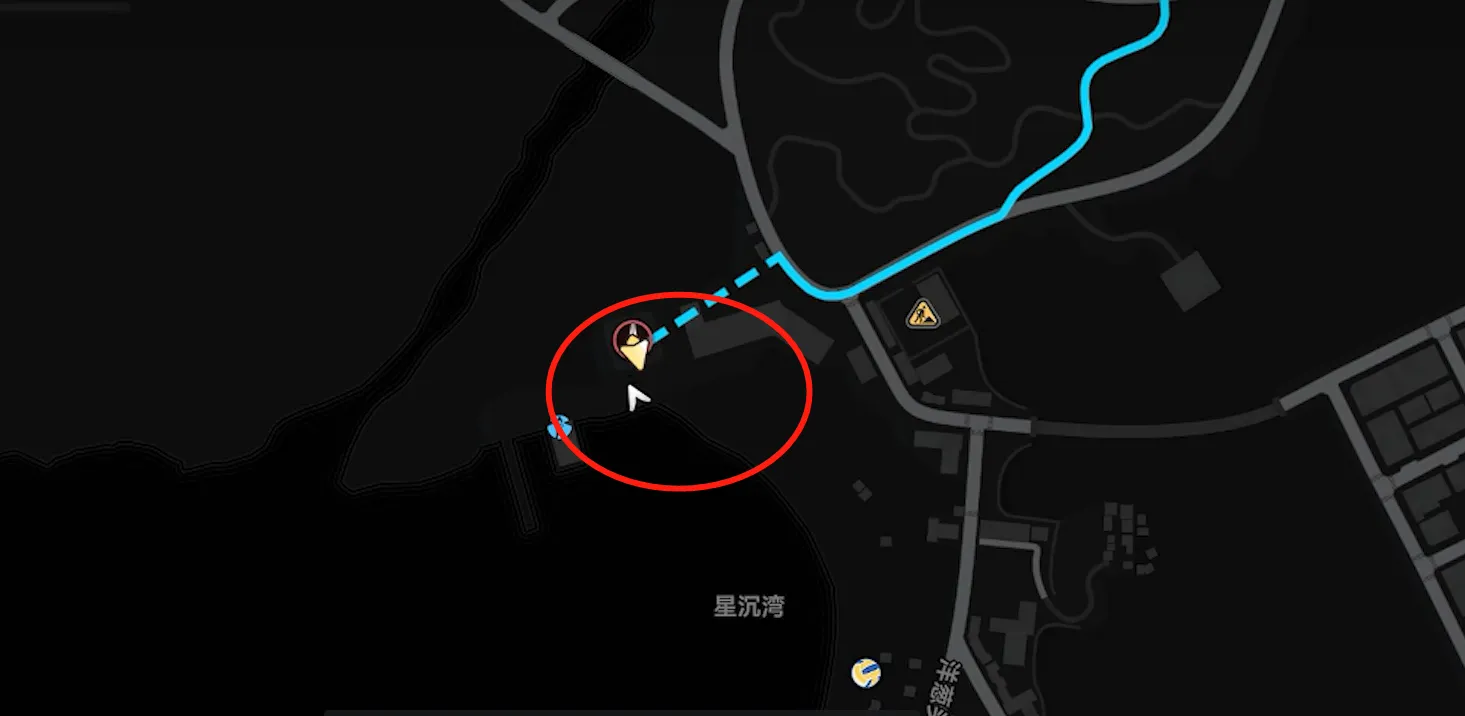
First, track An Ordinary Dream from the Anomaly Commission menu.
The mission starts at the Witteheim Tower Teleport Point above Star Bay.
After teleporting, follow this route:
- Head toward the upper-right area of the minimap and climb the stairs.
- Turn left and climb another set of stairs.
- Turn right and leave through the exit ahead.
- Once you reach the road, get on the motorcycle.
- Drive toward the upper part of the minimap and follow the tracked mission location.
When you reach the mission location, get off the motorcycle and head to the white house on the left side of the minimap.
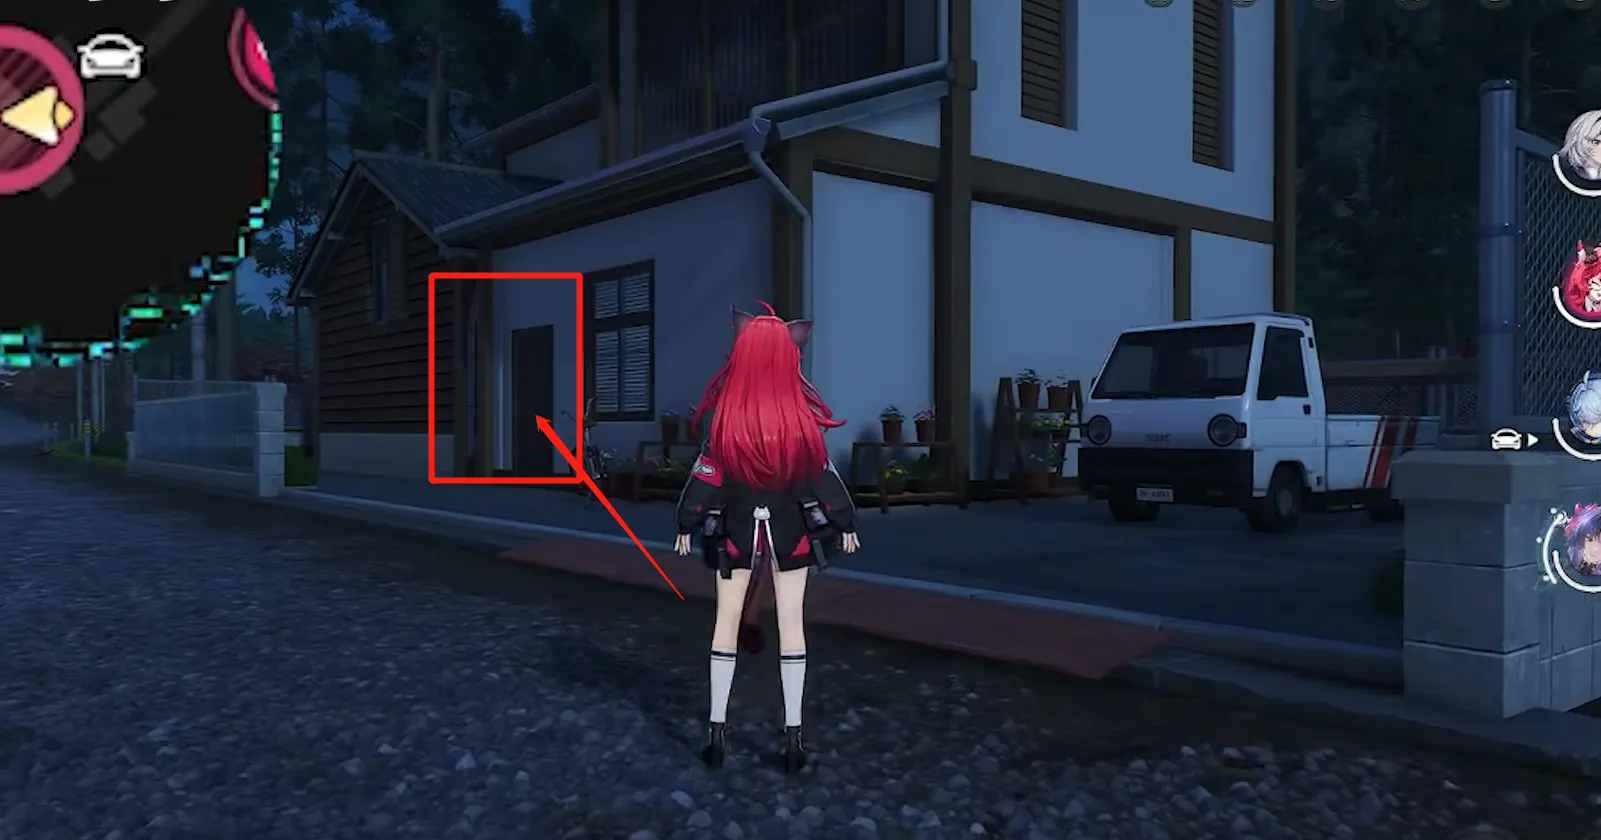
Enter the house, find the bed, and interact with it to rest. After resting, you will officially begin An Ordinary Dream.
Stage 1: Follow the White Shadows
After waking up, head to the upper-left corner of the minimap and leave through the door ahead.
Turn right and continue to the end. Then turn left and enter the room.
Move forward, pass through the door ahead, and jump down.
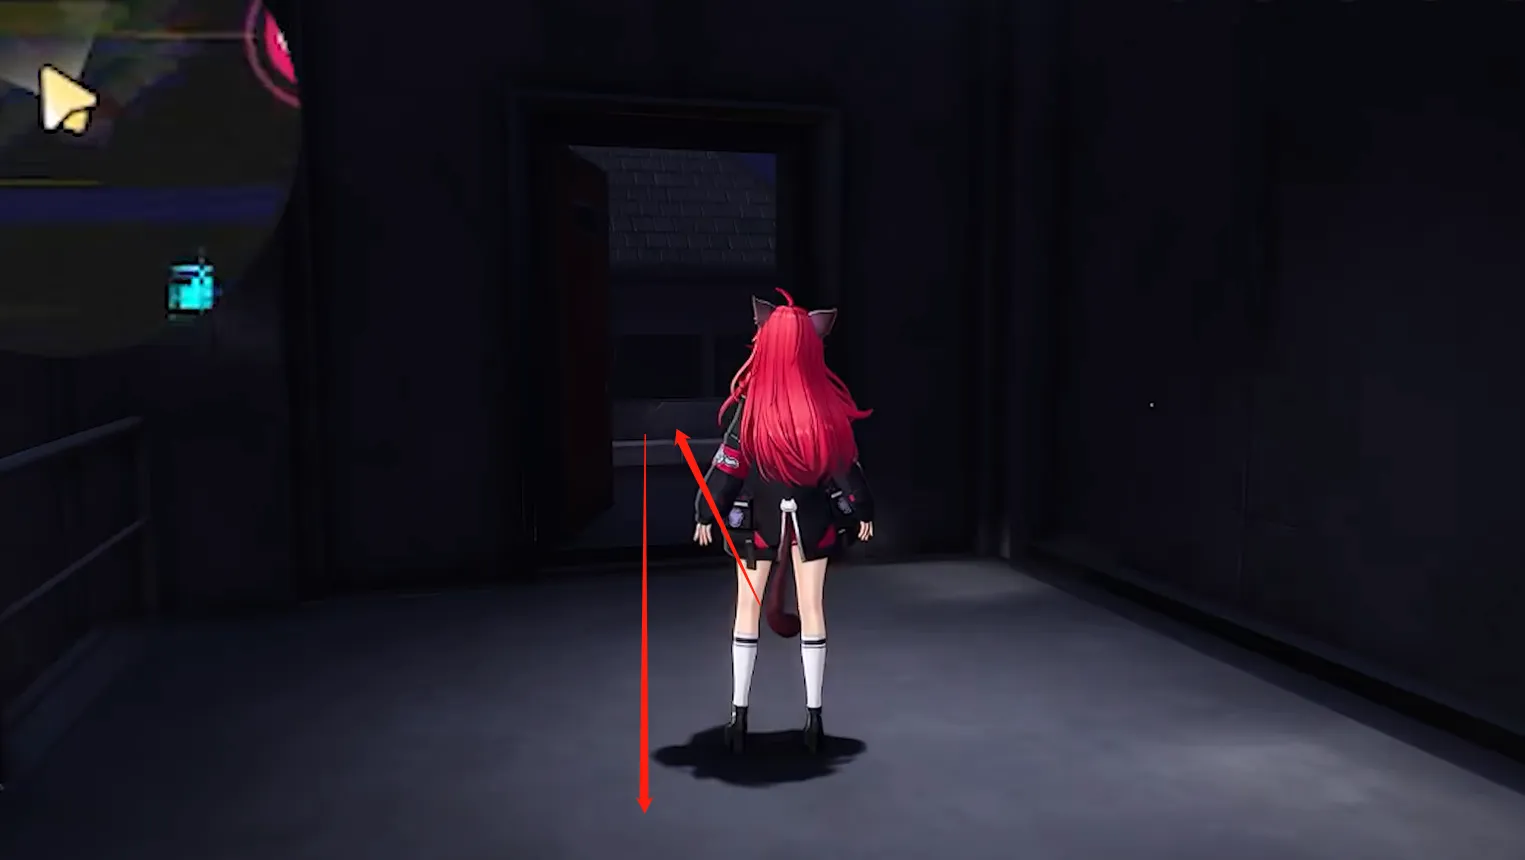
Continue through the doors along the route until you reach the area with the white shadows.
How to Get Past the White Shadows
The key is to follow the white shadows' route without getting too close to them.
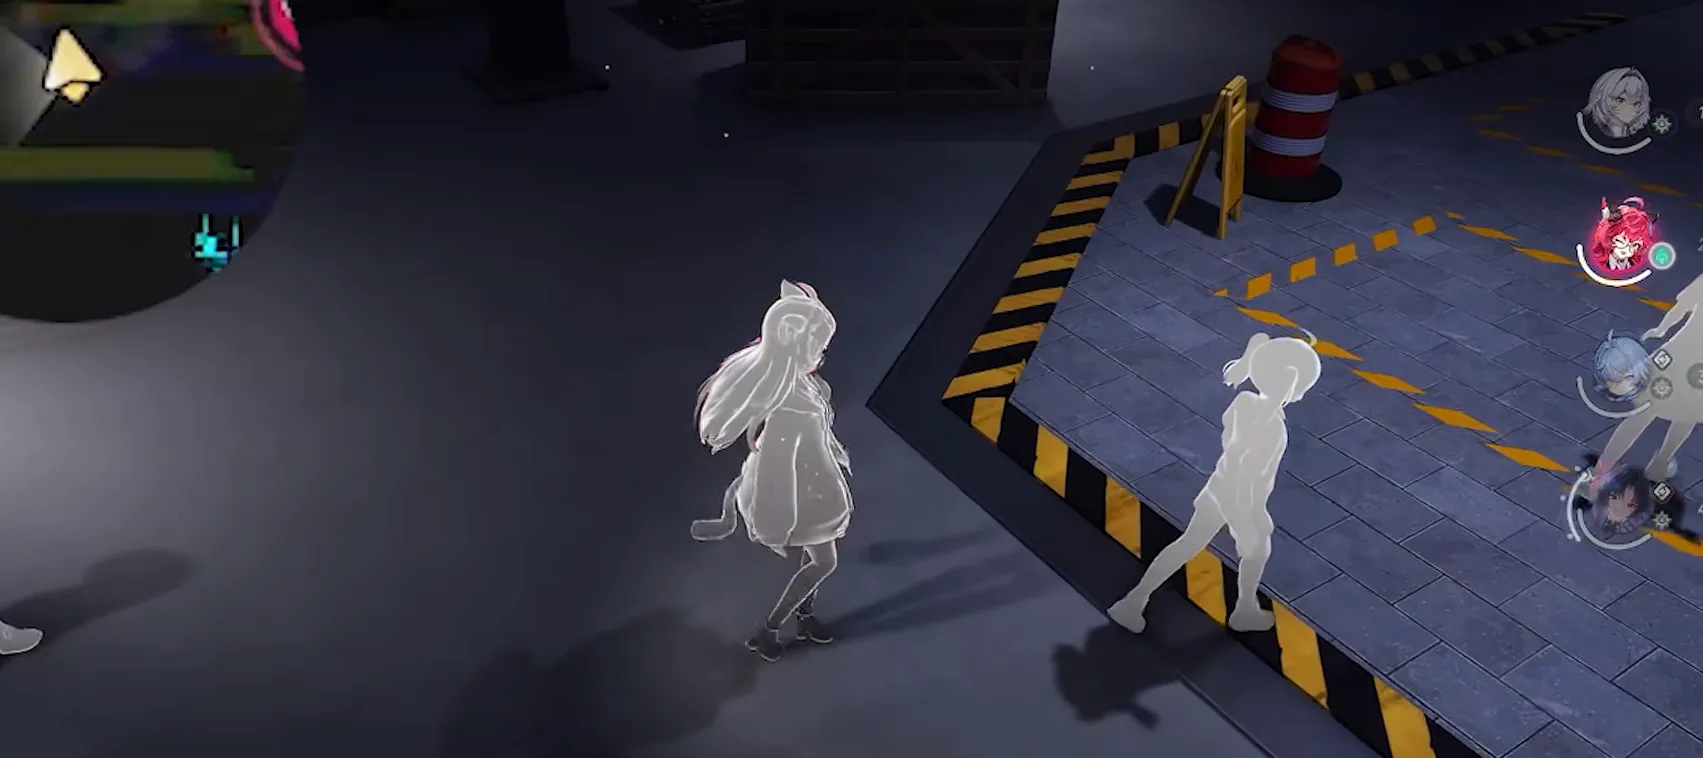
Follow these steps:
- Watch the position of the white shadows ahead.
- Move along the route behind them.
- Keep a safe distance and do not approach them directly.
- Wait for the white shadows to disappear one by one.
- Once the route is clear, jump down.
You do not need to confront the shadows directly. Waiting patiently is more effective than rushing forward.
Stage 2: Avoid the Lights and Solve the Classroom Puzzle
After jumping down, follow the corridor toward the upper-left area of the minimap.
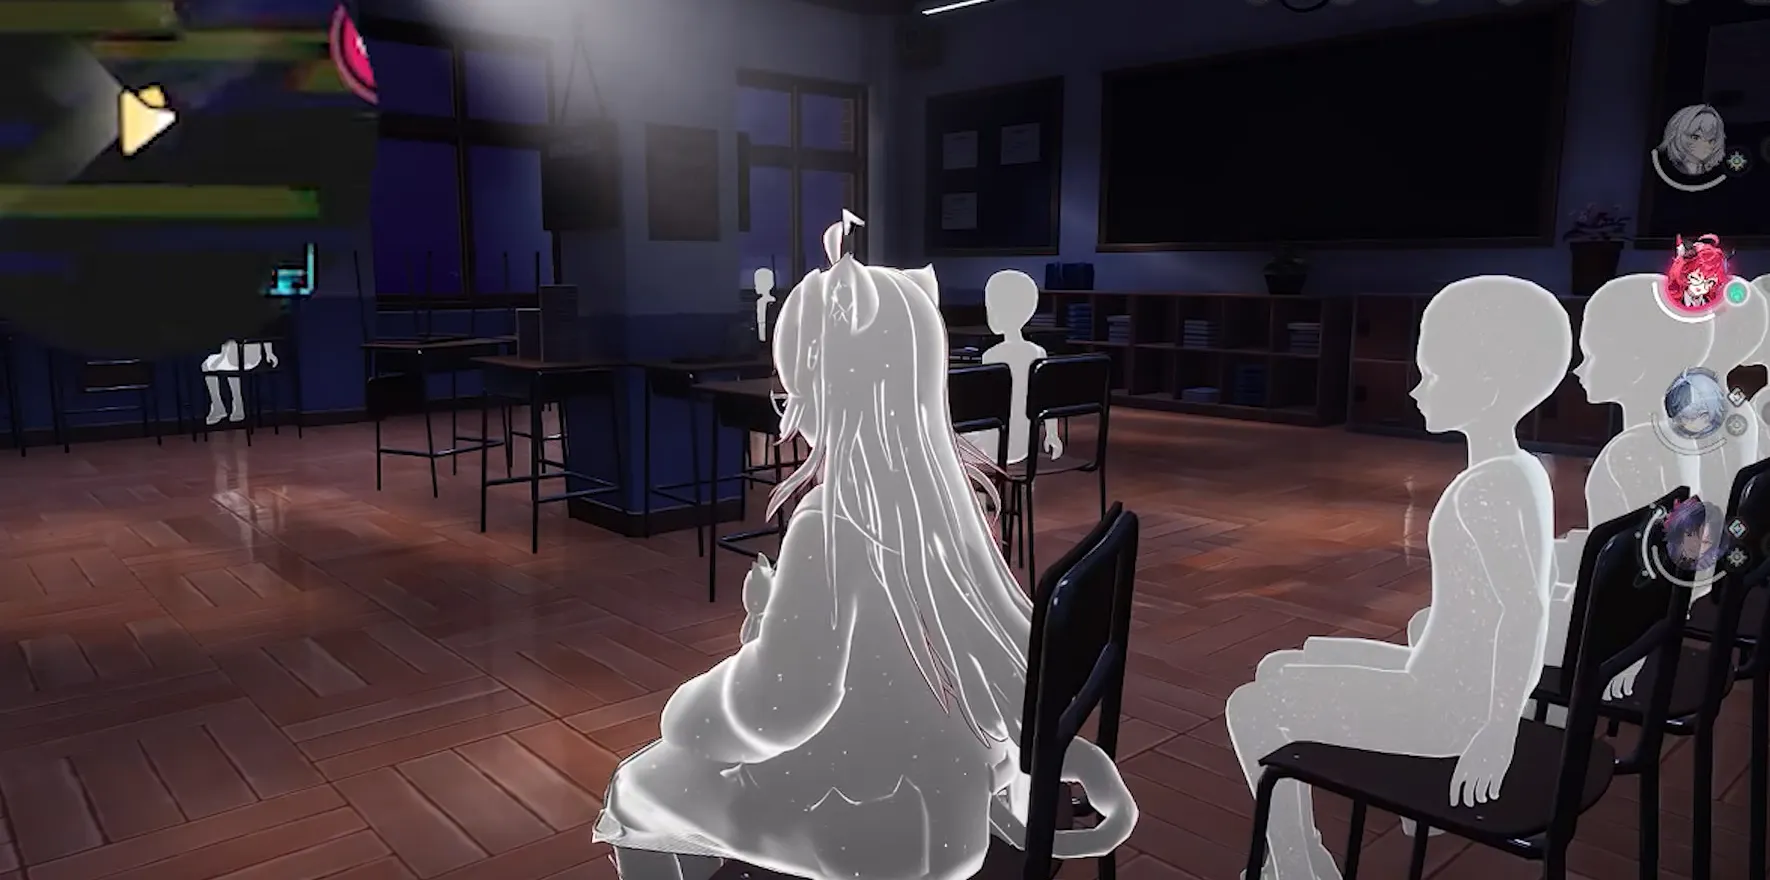
At the end, enter the classroom on the left, find a chair, and interact with it to sit down.
You will need to wait for the light ahead to move away.
First Light Section
While sitting, observe the direction in which the light moves.
Wait for it to leave the current area. This takes approximately 2 to 3 seconds.
Once the light has moved away, get up, leave through the gap, and find the next chair to sit on.
Second Light Section
Continue watching the light while seated.
Wait until it moves near the blackboard ahead. Then stand up and move toward the upper part of the minimap.
Leave through the door on the right, continue forward, and jump down. Enter the classroom on the left and sit on the chair again.
Third Light Section
Use the same approach in this section.
Stay seated and wait for the light to move away. Once the route is clear, start moving.
Leave through the gap in the upper part of the minimap, continue to the end, and jump down.
Then enter the corridor ahead and keep moving forward.
Stage 3: Enter the Dormitory and Complete the Dream
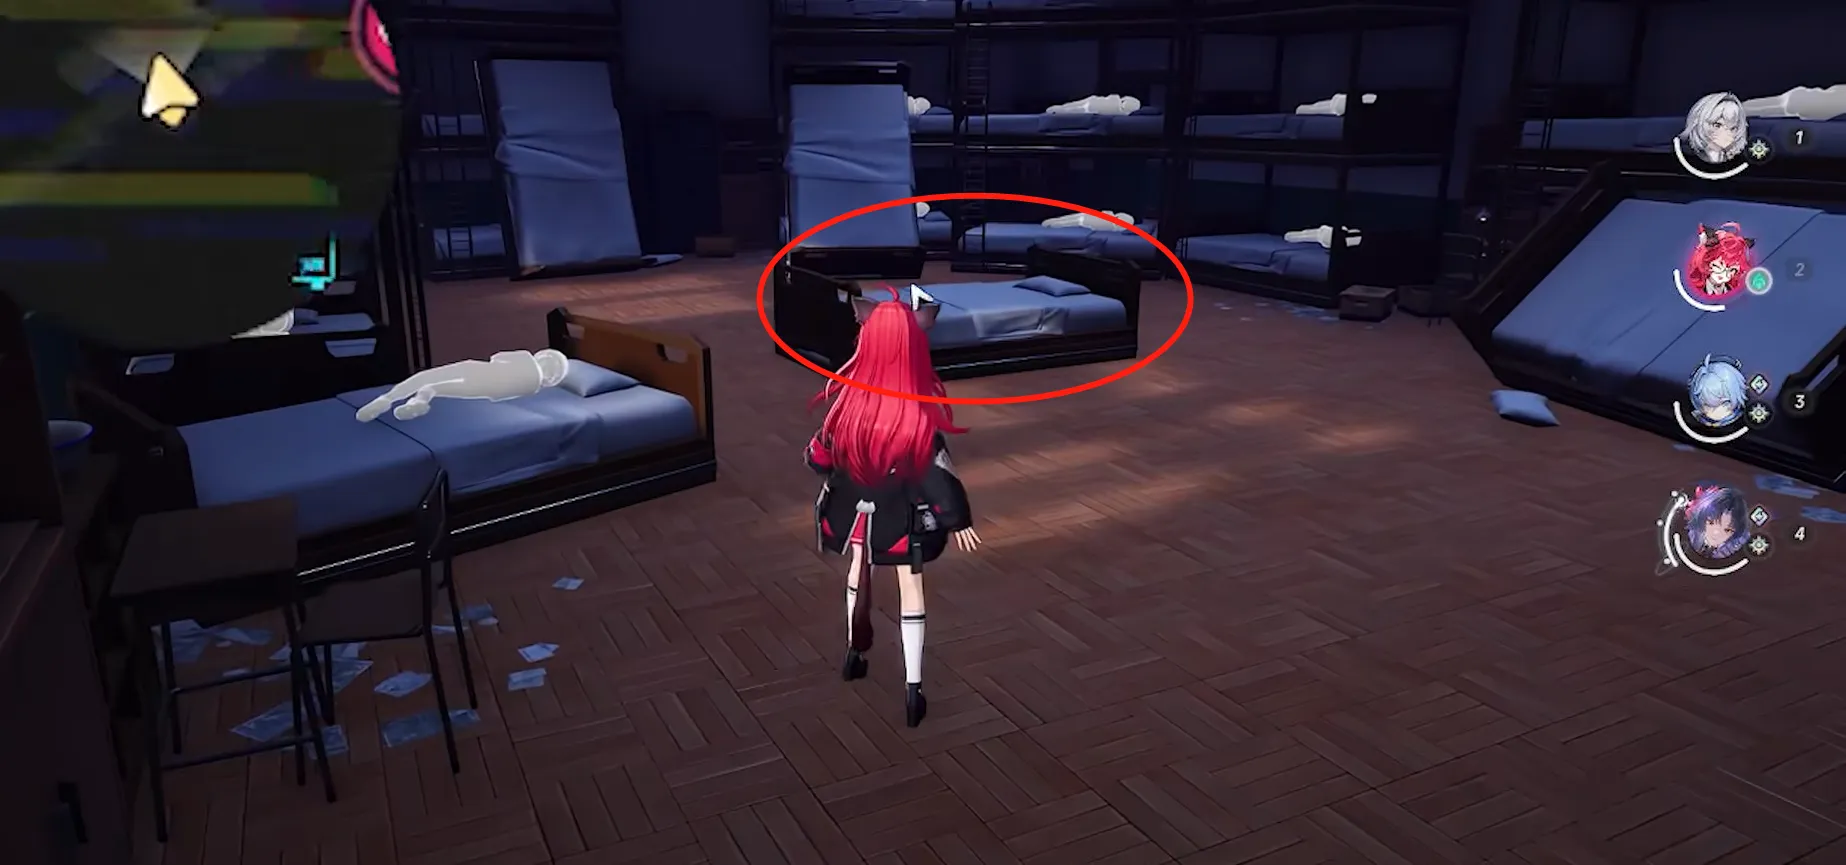
Follow the corridor to the end, turn left, and enter the dormitory.
Then head toward the left side of the minimap and leave through the gap ahead. Continue through the entrance in front of you and follow the route all the way to the end.
Once you reach the central area, find the bed and interact with it to rest. After resting, you will receive an achievement and complete An Ordinary Dream.
An Ordinary Dream Quick Walkthrough
|
Stage |
Key Action |
|
Starting Location |
Witteheim Tower above Star Bay |
|
Travel to the Mission |
Ride the motorcycle along the road and follow the tracked location |
|
Enter the Dream |
Rest on the bed inside the white house |
|
White Shadows |
Follow behind the shadows without approaching them |
|
First Light |
Sit in the classroom and wait approximately 2 to 3 seconds |
|
Second Light |
Leave after the light moves near the blackboard |
|
Third Light |
Wait for the light to move away, then pass through the gap |
|
Final Area |
Enter the dormitory and head to the bed in the middle |
|
Completion |
Rest to receive an achievement and complete the Commission |
NTE 1.4 Anomaly Commissions: Frequently Asked Questions
1. How Many Safes Are in The Little People in the Mirror World?
There are 12 safes in total. Each safe rewards 20 Annulith, giving you 240 Annulith if you open all of them.
2. Why Do You Need a Small-Sized Character in The Little People in the Mirror World?
Some routes require you to pass through narrow gaps. A small-sized character can move through these sections.
3. How Do You Get the Doll onto the Bus in The Last Bus at Night?
After reading the newspaper at the first stop, head to the factory, find the crouching doll, and knock on it. Then bring it back to the bus. Make sure to pass through the bus stop before boarding to avoid clipping.
4. How Do You Deal with the Shadow in The Last Bus at Night?
After entering the factory at the second stop, activate the switches in order. Jump around to reach the switch behind the shadow, then lead the shadow toward the bus.
5. How Do You Avoid the Lights in An Ordinary Dream?
Find a chair in the classroom and sit down. Wait for the light to move away before moving. During the second section, wait until the light moves near the blackboard before continuing.
6. How Do You Complete An Ordinary Dream?
After reaching the dormitory, go to the bed in the middle and interact with it to rest. You will receive an achievement and complete the Anomaly Commission.
Conclusion
The three Anomaly Commissions in NTE Version 1.4 test your exploration skills, ability to operate mechanisms, and route planning. The Little People in the Mirror World requires you to collect items and search for safes. The Last Bus at Night involves reading newspapers, solving factory mechanisms, and guiding unusual passengers in the correct order. An Ordinary Dream focuses on observing shadows and lights and moving at the right moment. The routes themselves are manageable. The real trouble starts when you take a wrong turn and have to experience another shift of overtime at the Anomaly Management Bureau.
If you have completed all three Commissions, there is still plenty more to explore in NTE. Follow Mone for more game guides, character-building tips, and resource updates. If you need additional in-game resources, you can also check out NTE top up through Mone. Exploring anomalies is already demanding enough, so keeping your resource planning simple is never a bad idea.