


Canyon Clash isn't just another event in Whiteout Survival—it's the ultimate test of your alliance's strategic depth. Three alliances enter the Lost Canyon battlefield. Only one walks away with the highest point total. The battle lasts just one hour, but within that window, alliances fight for control of buildings, fortresses, and the coveted Frozen Citadel. Each Chief can deploy up to three squads, making every player a critical piece of a larger machine.
This guide covers everything from qualification and registration to advanced offensive and defensive tactics.


How to Join Canyon Clash
Canyon Clash runs on a monthly cycle, following a strict weekly schedule:
|
Phase |
Day |
|
Voting |
Monday & Tuesday |
|
Registration |
Wednesday & Thursday |
|
Matchmaking |
Friday |
|
Battle |
Saturday |
Not every alliance qualifies. Only the top 20 alliances on the Power Leaderboard are eligible to compete. Once qualified, R4 or R5 members must register the alliance and confirm the lineup. Each alliance can send up to two legions to different battlefields, provided the alliance has reached Level 6. A minimum of 15 total combatants and substitutes is required per legion.
For individual players, the requirements are straightforward:
- Must have joined the alliance before the registration period begins
- Furnace Level 16 or higher
- Must be active—players offline for 5+ days cannot participate
Each legion can field up to 30 combatantsand10 substitutes. Substitutes can enter the battlefield after the match begins if the roster drops below 30.
Pro tip: Alliance leaders should prepare early. Waiting until the last minute often results in weak deployment, missing players, or poor time coordination.
Compare regular in-game prices with current Mone prices to find the right WOS pack for your budget. The popular $4.99 pack currently offers the largest discount. Prices and discounts may change. The current price is always shown on the product page and again before payment.
Understanding the Lost Canyon Battlefield
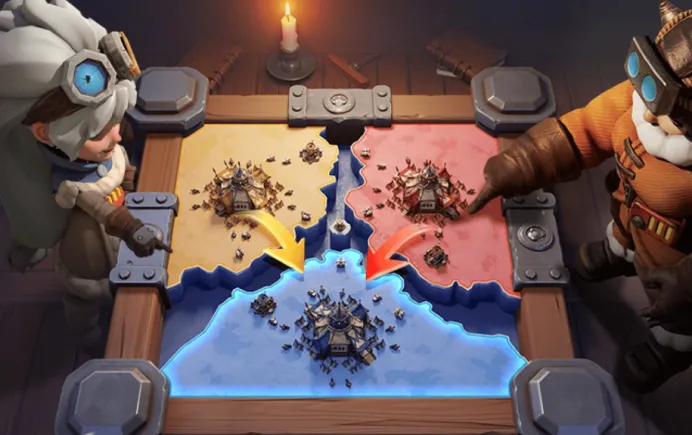
The battle takes place in Lost Canyon—a large map where each alliance starts from its own Bastion. The battlefield is filled with buildings of varying importance: basic ruins, airports, fortresses, and the central Frozen Citadel.
The Fuel System
Fuel is your primary currency in Canyon Clash. Every action costs fuel—deploying, healing, moving, reviving troops, advancing, retreating, and conscription all require it. Fuel regenerates automatically over time, but managing it wisely separates winning alliances from those that run dry halfway through.
Guardians are the key to fuel sustainability. Assigning Guardians to buildings increases your alliance's fuel income. Recent updates have added fuel bonus indicators for Guardians of different levels, making it easier to optimize assignments.
Combat Mechanics
Battles inside buildings operate on a queue system. When squads enter an occupied building, 1v1 automated battles occur. The winning squad moves to the end of the queue; the defeated squad is eliminated and must be revived at the Bastion.
You can only attack buildings adjacent to structures your alliance already controls. This adjacency rule makes chokepoints—especially bridges—critically important.
Conscription and Healing
Troops stationed in controlled buildings can be healed using the"Conscript"option at a fuel cost. This reduces the need for costly full revives and keeps your squads in the fight longer.
The Three Phases of Canyon Clash
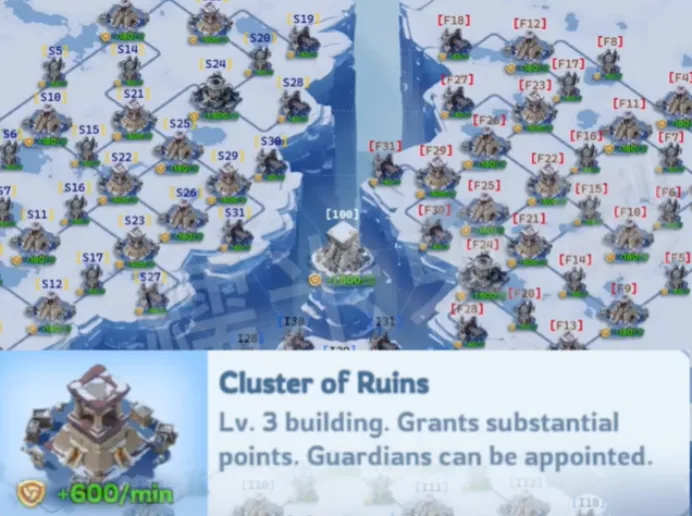
The battle unfolds across three distinct phases, each requiring a strategic shift.
Phase 1: Seize and Conquer (First 17 Minutes)
The opening phase is all about territory grabbing. Your alliance should:
- Secure as many neutral buildings as possible
- Capture bridges and key entry points to prevent enemy advances
- Take a few enemy buildings early for a points advantage
- Avoid over extension—pushing too deep leaves your territory vulnerable
Speed and positioning define this phase. The alliances that secure good ground early set the stage for everything that follows.
Strategic insight: Spread your forces. Sending all marches to the same building wastes time and fuel. A coordinated, distributed push across multiple fronts yields faster territorial control.
Phase 2: Fortress Occupation (Next 20 Minutes)
Fortresses become available across the battlefield. These structures generate massive points and are positioned along key routes. Control of fortresses often determines who controls the battlefield.
Your priorities:
- Defend your own fortress at all costs—losing it is a major setback
- Capture an enemy fortress if possible—holding two fortresses can almost guarantee victory
- Prepare reinforcements nearby so you can take fortresses as soon as they open
Strategic insight: The stronghold connected to Point 2 becomes accessible only in Phase 2. The faction in the upper-left corner can target it during Phase 1, making it contested territory when Phase 2 begins. Similarly, the stronghold linked to Point 5 is exclusively accessible to your faction—secure it early for a strategic advantage.
Phase 3: Citadel Onslaught (Final 20 Minutes)
The Frozen Citadel—the most important structure in Canyon Clash—opens in the center of the map. Controlling it grants massive points and provides bonus points during the tally stage.
Critical mechanics:
- The first alliance to defeat the final guard inside the Citadel claims control
- If you control it, send a constant flow of reinforcements to defend it
- If you don't control it,cut off enemy reinforcements by capturing nearby buildings
Strategic insight: The Citadel is a comeback mechanic. Even if your alliance is behind in points, a well-timed push for the Citadel can turn the entire battle around.
Offensive Strategies for Success
High-power players lead the charge. If low-power players are included in the initial push, failed battles cause long queues that give opponents time to regroup. High-power units should capture key targets first, clearing the path for mid- and low-power players to move in and defend.
March Speed Matters: Speeding up marches is highly effective, especially when trying to secure contested buildings. Use march speed-ups strategically—a few seconds can mean the difference between capturing a fortress and watching an enemy squad beat you to it.
Attack Adjacency Rules: Remember: you can only attack buildings adjacent to structures your alliance already controls. Plan your path of advance carefully. Securing bridges early creates chokepoints and opens multiple attack routes into enemy territory.
Defensive Tactics to Counter Attacks
Defense in Canyon Clash requires quick adjustments and vigilance. When an enemy faction launches a push:
- Recognize the enemy's strategy early—the faster you identify their target, the faster you can respond
- Reposition to reinforce key buildings at risk
- High-power players engage attackers directly
- Mid- and low-power players fortify rear structures
Pro tip: Maintain constant communication. A coordinated defense that reallocates troops efficiently will prevent the enemy from gaining a foothold in your territory.
The Guardian System
Assigning capable Guardians within your alliance is essential for responding quickly to changing battlefield conditions. Alliance leaders should frequently update these roles to match the evolving strategy. Guardians not only boost fuel income but also serve as rally points for defense.
Rewards and Progression
All participants receive rewards based on performance, win or lose.
Personal Merit Rewards
Earned based on individual contributions. You need a minimum of 10,000 Personal Merits to qualify. As of October 2025, rewards now feature Shotchits for the Deadshot mini-game. Since April 2026, Refined Fire Crystals are also available.
Alliance Ranking Rewards
Issued based on Legion 1's final point ranking. Higher ranks get better rewards.
Canyon Shop
Use event currency to purchase rare items, including hero shards, speed-ups, and resources.
Updated Rewards (2025-2026)
As of 2025 and 2026, Canyon Clash rewards now include Refined Fire Crystals and Shotchits for the Deadshot mini-game. These are valuable endgame resources—Refined Fire Crystals are required for upgrades after reaching FC5 and become one of the biggest bottlenecks at FC6+.
Essential Tips for Canyon Clash
Manage fuel carefully— Don't waste it on unnecessary movements or revives. Monitor your fuel recovery rate; running dry halfway through the game leaves you unable to move.
Always assign Guardians— They increase fuel income. Different Guardian levels provide different fuel bonuses, so optimize assignments.
Reinforce key positions— Holding strategic buildings is more important than mindless aggression.
Use march speed-ups— Reach contested buildings faster than your opponents.
Stay coordinated— Communication and teamwork win battles, not just raw power.
Prepare your second legion— Larger alliances can field a second legion (requires Alliance Lv. 6), but only if you have enough active players. A weak second legion may struggle without coordination.
Conclusion
Canyon Clash is the pinnacle of strategic alliance warfare in Whiteout Survival. It's not about who has the biggest wallet or the highest power level—it's about who can coordinate better, manage resources smarter, and execute a plan under pressure.
From the opening scramble for neutral buildings to the fortress battles that decide control of the map, and finally to the Frozen Citadel where battles are won or lost, every decision matters. The alliances that communicate effectively, assign Guardians wisely, and balance offense with defense are the ones that stand atop the leaderboard.